
Time Machine Snapshots Are Eating Your Disk Space: How to Get It Back
Quick Answer
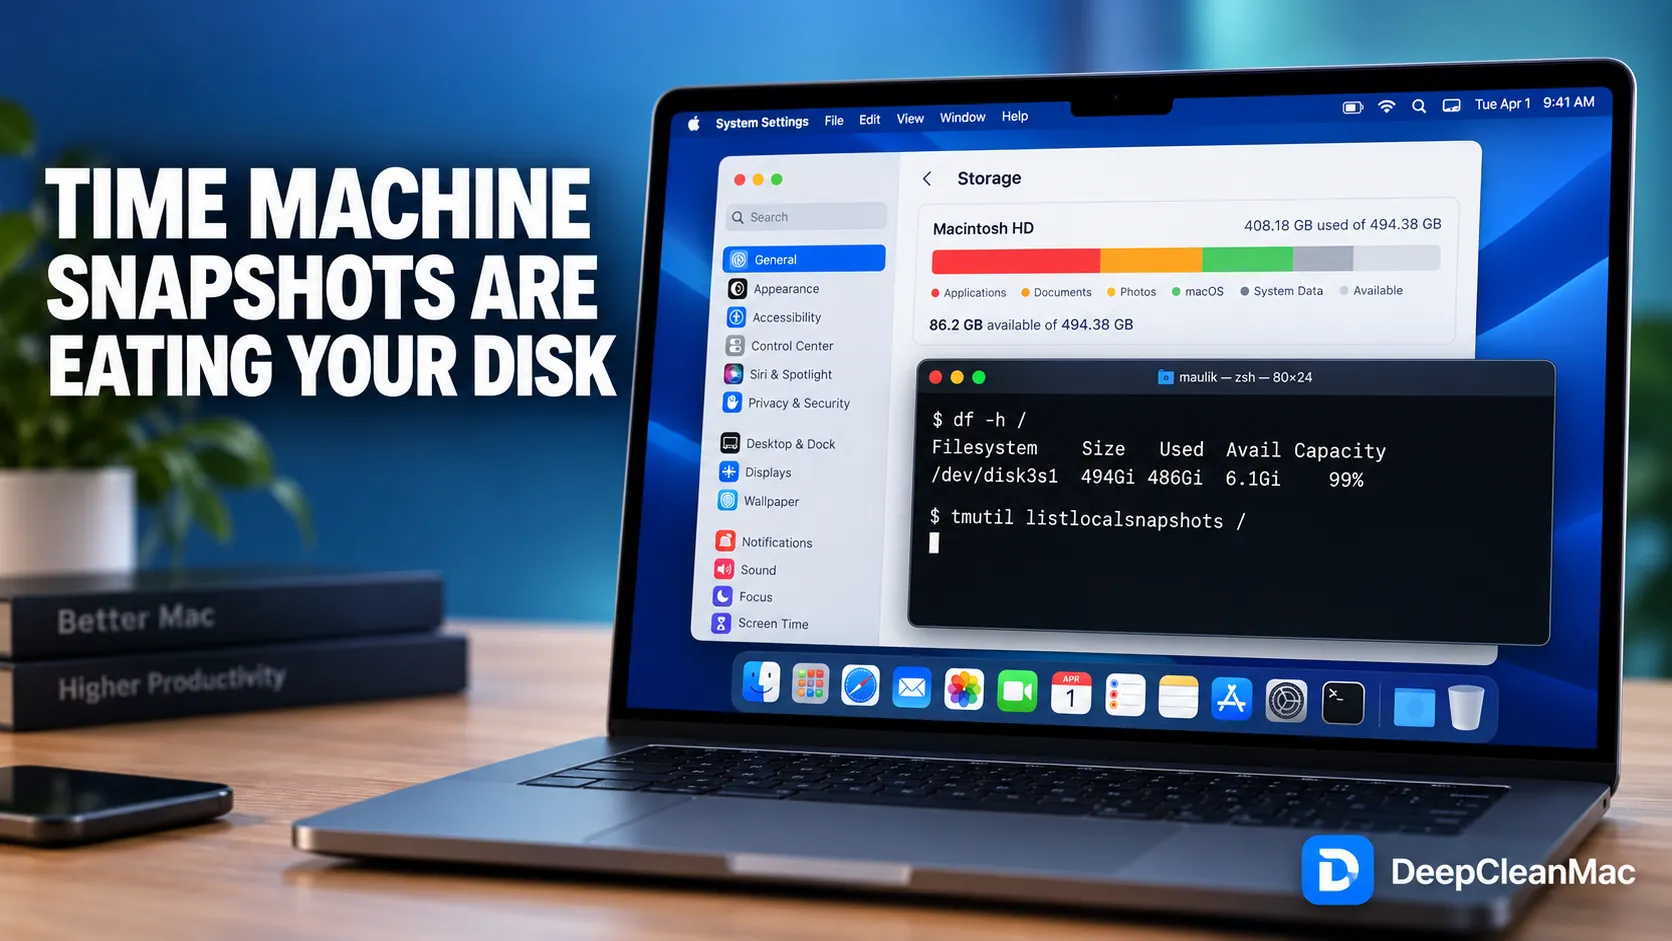
If your Mac reports plenty of free space but refuses to write files, APFS local snapshots are almost certainly holding the difference. Time Machine takes one snapshot of your startup disk roughly every hour and keeps each for 24 hours, and every snapshot pins the disk blocks its files occupied at the moment it was taken. Run df -h / in Terminal and compare the Avail column against what System Settings reports. A gap of tens of gigabytes means snapshots. List them with tmutil listlocalsnapshots / and reclaim space with sudo tmutil thinlocalsnapshots / 50000000000 4. Apple says snapshots purge automatically when space is needed, and usually they do - but the cases that bring people here are the ones where that did not happen.
Your Mac says it has 80GB free. You try to export a video, or install an update, or copy a folder across, and it tells you there is not enough space. Nothing you delete seems to help, and the free space figure barely moves when you empty the Trash.
This is the single most confusing storage problem on a modern Mac, and it has nothing to do with clutter. The space is real, it is accounted for, and something is holding onto it: APFS local snapshots, taken by Time Machine, sitting on your startup disk. On macOS 27 Golden Gate the picture got slightly worse, because the upgrade added roughly 10GB to what Time Machine needs on the backup drive as well, and that part does not come back.
This guide shows you how to confirm snapshots are the cause, how to remove them safely from Terminal, how to reclaim space on the backup drive itself, and how to stop the pattern repeating. It also covers the Golden Gate change that quietly broke network backups for a lot of people.
5 Steps to Reclaim Space Held by Time Machine Snapshots
Method 1: Confirm Snapshots Are Actually the Problem
Step 1: Open Terminal from Applications > Utilities.
Step 2: Run: df -h /
Step 3: Read the Avail column. This is the space the kernel will genuinely hand to an application that asks for it.
Step 4: Open Apple menu > System Settings > General > Storage and let the bar finish calculating. Note the free space it shows.
Step 5: Compare the two numbers. Finder and System Settings count purgeable blocks as available; df does not. If System Settings claims 80GB free and df shows 6GB, you have roughly 74GB of purgeable data.
Step 6: Run: tmutil listlocalsnapshots /
Step 7: Count the entries. Each line is a snapshot with a timestamp in its name. A healthy Mac shows a handful covering the last 24 hours. Dozens of them, or entries weeks old, means expiry is not working.
Step 8: Write down the df figure, the System Settings figure, and the snapshot count before you change anything. You need the before numbers to know whether any of this worked.
This step matters because the number that sends people looking for help is usually the wrong number. Finder was designed to tell you what you could theoretically use, not what is free right now, and on APFS those are different quantities. Purgeable space is real space that macOS believes it can reclaim on demand - snapshot data, evictable caches, files already uploaded to iCloud. The installer for a macOS update does not trust purgeable space and neither should you when you are diagnosing. If df and System Settings agree to within a few gigabytes, snapshots are not your problem and you are looking at ordinary clutter, which the guides on clearing system data and freeing up space cover properly. If they disagree by tens of gigabytes, keep reading, because nothing you delete in Finder will fix this.
Method 2: Thin or Delete Local Snapshots With tmutil
Step 1: Make sure you have a current Time Machine backup on an external drive before removing anything. Local snapshots are not backups, but they are the only on-disk copy of recent changes.
Step 2: In Terminal, run: tmutil listlocalsnapshots /
Step 3: To reclaim space gradually, run: sudo tmutil thinlocalsnapshots / 50000000000 4
Step 4: Read that command as: thin snapshots on the boot volume until 50GB is free, at urgency level 4. The number is in bytes, so 50000000000 is roughly 50GB. Urgency runs 1 to 4, where 4 is the most aggressive and removes the most.
Step 5: Re-run df -h / and check whether Avail moved. Thinning at a lower urgency may free nothing if macOS decides the snapshots are still worth keeping.
Step 6: To remove one specific snapshot, run: sudo tmutil deletelocalsnapshots 2026-09-18-084512 using the exact timestamp from the list. The date form matches that timestamp on every mounted disk, not only the boot volume.
Step 7: If you need every local snapshot gone, run: sudo tmutil deletelocalsnapshots / - passing a volume instead of a date clears every local snapshot on it in one command. Reach for this only after thinning has failed, because it leaves you with no on-disk copy of recent changes until the next snapshot is taken.
Step 8: Re-run tmutil listlocalsnapshots / to confirm the list is shorter, then re-check df.
Thinning is the safe operation and deletion is the blunt one, so reach for thinlocalsnapshots first. The urgency argument is the part most guides get wrong: at urgency 1 macOS is conservative and will often report success while freeing almost nothing, which is why people conclude the command does not work. Urgency 4 tells it to stop being precious. Also worth knowing that a snapshot pins the blocks a file occupied, not the file itself - so if you deleted a 60GB video yesterday, that space does not come back until every snapshot taken while the video existed is gone. This is the mechanism behind the most common complaint about Time Machine: you delete something enormous, you check Storage, and nothing changed. Nothing is broken. You are looking at a snapshot holding the blocks.
Method 3: Reclaim Space on the Backup Drive Itself
Step 1: Connect your Time Machine drive and open Disk Utility from Applications > Utilities.
Step 2: Choose View > Show APFS Snapshots from the menu bar.
Step 3: Select your Time Machine volume in the sidebar. The snapshot list appears below the volume information.
Step 4: Look at the Private Size column. This is the space used by files unique to that snapshot - the space you would actually recover by deleting it.
Step 5: Right-click the column header and add Cumulative Size, which shows what you would recover by deleting that snapshot and every older one.
Step 6: Be patient here. On a spinning hard drive this calculation can take many minutes, and Disk Utility gives little indication that it is working.
Step 7: Delete the oldest snapshots first using the minus button, checking the drive's free space between deletions.
Step 8: If the drive is simply too small, stop deleting and replace it. Apple's guidance is a backup drive at least twice the size of the disk you are backing up.
There is a quicker reset that solves most backup-drive complaints without touching Disk Utility. Open System Settings > General > Time Machine, click Options, set Backup Frequency to Manually, wait a few minutes, and let macOS clear the local snapshots itself, then switch automatic backups back on. That sequence resolves the majority of stuck-snapshot cases. Reach for Disk Utility when you need to understand which snapshot is expensive rather than just clearing the decks. One thing worth knowing before you panic about backup growth: Time Machine thins more intelligently than it gets credit for. Measurements published in September 2026 tracked a 100GB virtual machine that was accidentally caught in backup scope, and around 50GB disappeared from the backup drive within 24 hours once the retention policy noticed. The thinning works. It just does not work on the schedule you would like.
Method 4: Stop the Churn That Creates Giant Snapshots
Step 1: Open System Settings > General > Time Machine and click Options.
Step 2: Click the plus button under the exclusion list.
Step 3: Add every virtual machine bundle you own - Parallels, VMware, UTM and VirtualBox disk images all qualify.
Step 4: Add any large disk images, database files, or working folders that change constantly throughout the day.
Step 5: If you develop on the machine, add build output and container storage. Docker.raw and Xcode DerivedData are the usual offenders.
Step 6: Back those excluded items up separately, on a schedule you control. Excluding something from Time Machine is not the same as deciding it does not matter.
Step 7: Run tmutil listlocalsnapshots / again after a day and confirm the snapshot sizes have settled.
A virtual machine is the worst possible shape of file for Time Machine. It is one enormous file that changes continuously while the VM runs, so every hourly snapshot captures a fresh copy of its state and holds it for 24 hours on the same volume you are trying to free. Two 100GB VMs running through a working day can pin several hundred gigabytes without a single one of your own files changing. The same logic applies at smaller scale to disk images, large databases, and container storage. If your snapshots are unexplainably large and you run VMs, you have found your answer, and exclusion is a permanent fix rather than a cleanup you repeat every month.
Method 5: Fix What Golden Gate Changed About Time Machine
Step 1: If your backups run to a network drive or NAS, check which protocol it uses. macOS 27 Golden Gate supports Time Machine over SMB 2 or later only.
Step 2: If your NAS offers both, switch its Time Machine share to SMB and re-select the destination in System Settings > General > Time Machine.
Step 3: If you back up to an AirPort Time Capsule, accept that it no longer works. Tahoe was the last macOS release supporting Time Machine over AFP.
Step 4: Expect roughly 10GB of extra space used on the backup drive after upgrading to Golden Gate. This is Apple Intelligence overhead and it is permanent.
Step 5: If your first backup after upgrading looks like a full backup rather than an incremental one, check that snapshot operations are working with tmutil listlocalsnapshots /
Step 6: An empty snapshot list on a Mac with Time Machine enabled points at broken snapshot handling, which forces Time Machine into full-size backups.
Step 7: Restart, then run a manual backup with tmutil startbackup and watch whether a new snapshot appears.
The AFP removal is the change that caught people out, because nothing warns you until a backup fails. If you have an older NAS that only speaks AFP for Time Machine shares, or a Time Capsule sitting in a cupboard doing its job quietly for years, Golden Gate ended that arrangement. Independent measurement on an M4 Pro found the upgrade added about 10GB to backup storage overnight and, unlike the virtual machine data in the same test, it never came back. Budget for it. On a backup drive that was already close to full, that 10GB is enough to start forcing out your oldest restore points, which means the upgrade can quietly cost you backup history as well as space.
What Is Actually Holding Your Space
Snapshots are not one thing, and the fix depends on which kind you have. Here is what typically sits on a Mac in this state, with an honest note on whether the space comes back.
| What Is Pinning the Space | Size and Whether You Get It Back |
|---|---|
| Hourly local snapshots on the boot volume | Typically 5-50GB, and yes, recoverable. Time Machine takes one snapshot of your startup disk roughly every hour and keeps each for about 24 hours, longer when space allows. On a Mac where files change slowly these stay small. On a Mac with heavy daily churn they grow fast. These expire on their own, and thinlocalsnapshots removes them early. |
| The last successful backup snapshot | Usually a few GB, recoverable but not worth removing. macOS keeps one snapshot of the most recent successful backup until the space is needed elsewhere. This is the snapshot that lets you restore files when the backup drive is not connected, which is most of the time on a laptop. Deleting it manually saves little and costs you the thing local snapshots exist to provide. |
| Apple Intelligence overhead added to backups | Around 10GB on the backup drive after Golden Gate, and no, it does not come back. Measured on an M4 Pro over a 38-day tracking period, the upgrade increased Time Machine's space requirement overnight and the increase held. This is separate from the roughly 20-35GB the same assets occupy on your boot volume, which is also permanent. |
| Virtual machines and disk images caught in snapshots | Frequently 100GB or more, recoverable and entirely preventable. A running VM rewrites its disk image continuously, so each hourly snapshot pins another copy of its state for 24 hours. This is the most common cause of snapshot sizes that look impossible. Excluding VMs from Time Machine fixes it permanently rather than temporarily. |
| Snapshots that refuse to expire | Anywhere from 20GB to several hundred, recoverable but only by hand. Apple's position is that snapshots are purged automatically when space is needed. In practice there are well-documented cases of users locked out of hundreds of gigabytes by snapshots that stayed put even after Time Machine was switched off entirely. Manual thinning is the reliable fix. |
| A backup drive with no headroom left | Not recoverable by cleaning, because nothing is wrong. As a backup drive fills, Time Machine deletes your oldest backups to make room, so the symptom is lost history rather than lost space. One tracked Mac added 7.6GB per week to a 2TB drive, putting it on course to fill in roughly 115 weeks. When you reach that point the answer is a bigger drive. |
Why Deleting Files Does Not Free Any Space
The behaviour that makes this problem feel supernatural is simple once you know the mechanism. APFS snapshots do not copy your files. They record the state of the filesystem at a moment in time by holding onto the specific disk blocks that were in use. As long as a snapshot exists, those blocks cannot be reused, whether or not the file that occupied them still appears in Finder.
So when you drag a 60GB folder to the Trash and empty it, the directory entry disappears immediately and the space does not. Every snapshot taken while that folder existed is still pointing at its blocks. You will get the space back when the last of those snapshots expires, which on default settings means roughly 24 hours later. Not one minute sooner, no matter how many times you check Storage.
This is also why the advice to delete large files first is exactly backwards on a Mac in this state. If you are at the point where the disk will not accept writes, deleting files achieves nothing for a day, and you may well delete something you wanted while you wait. Thin the snapshots first, then decide what to remove with a clear view of what is actually using space.
There is one more wrinkle worth knowing. Disk analysers like DaisyDisk, OmniDiskSweeper and GrandPerspective each build their own cache of folder contents while scanning, which needs free space to write. On a disk that is genuinely full, they may not be able to run at all. Install the tool you like before you need it, not during the emergency.
How to Keep Snapshots From Taking Over Again
Check the gap, not the free space figure
Make df -h / your habit rather than glancing at System Settings. The single number worth watching is the difference between what df reports and what Finder claims. When that gap grows past 20GB or so, snapshots are accumulating faster than they expire, and you can deal with it before the disk stops accepting writes.
Exclude anything that changes all day
Virtual machines, disk images, container storage, large working databases and build output all belong in Time Machine's exclusion list. These are the files that turn a 3GB hourly snapshot into a 90GB one. Back them up separately if they matter, but keep them out of the hourly cycle.
Give a big deletion 24 hours before judging it
After clearing out a large folder, wait a day before concluding it did not work. The snapshots holding those blocks need to age out first. Checking Storage five minutes later and seeing no change is the expected result, not evidence that something went wrong.
Never run an APFS volume to genuinely zero
Some guides suggest filling the disk to force macOS to purge snapshots. Do not. An APFS volume driven to truly zero free space can become difficult to write to at all, and recovering from that is considerably harder than thinning snapshots was going to be. Use thinlocalsnapshots instead.
Size the backup drive properly
Apple's guidance is a backup disk at least twice the capacity of the drive you are backing up, and that was written before Golden Gate added roughly 10GB of AI overhead. If your backup drive is the same size as your internal one, you are not really backing up - you are keeping a copy of today and losing your history quietly.
Confirm your NAS speaks SMB before you upgrade
If your backups go to a network destination, check it offers a Time Machine share over SMB 2 or later. Golden Gate dropped AFP support entirely, and the failure is silent until you look. An unnoticed broken backup is a worse problem than a full disk.
How DeepCleanMac Helps With Snapshot Problems
Let us be precise about this one, because the honest answer is more useful than a sales pitch. DeepCleanMac does not delete APFS snapshots. Nothing we could responsibly ship would - tmutil is Apple's supported interface for that, and method 2 above is the right way to do it.
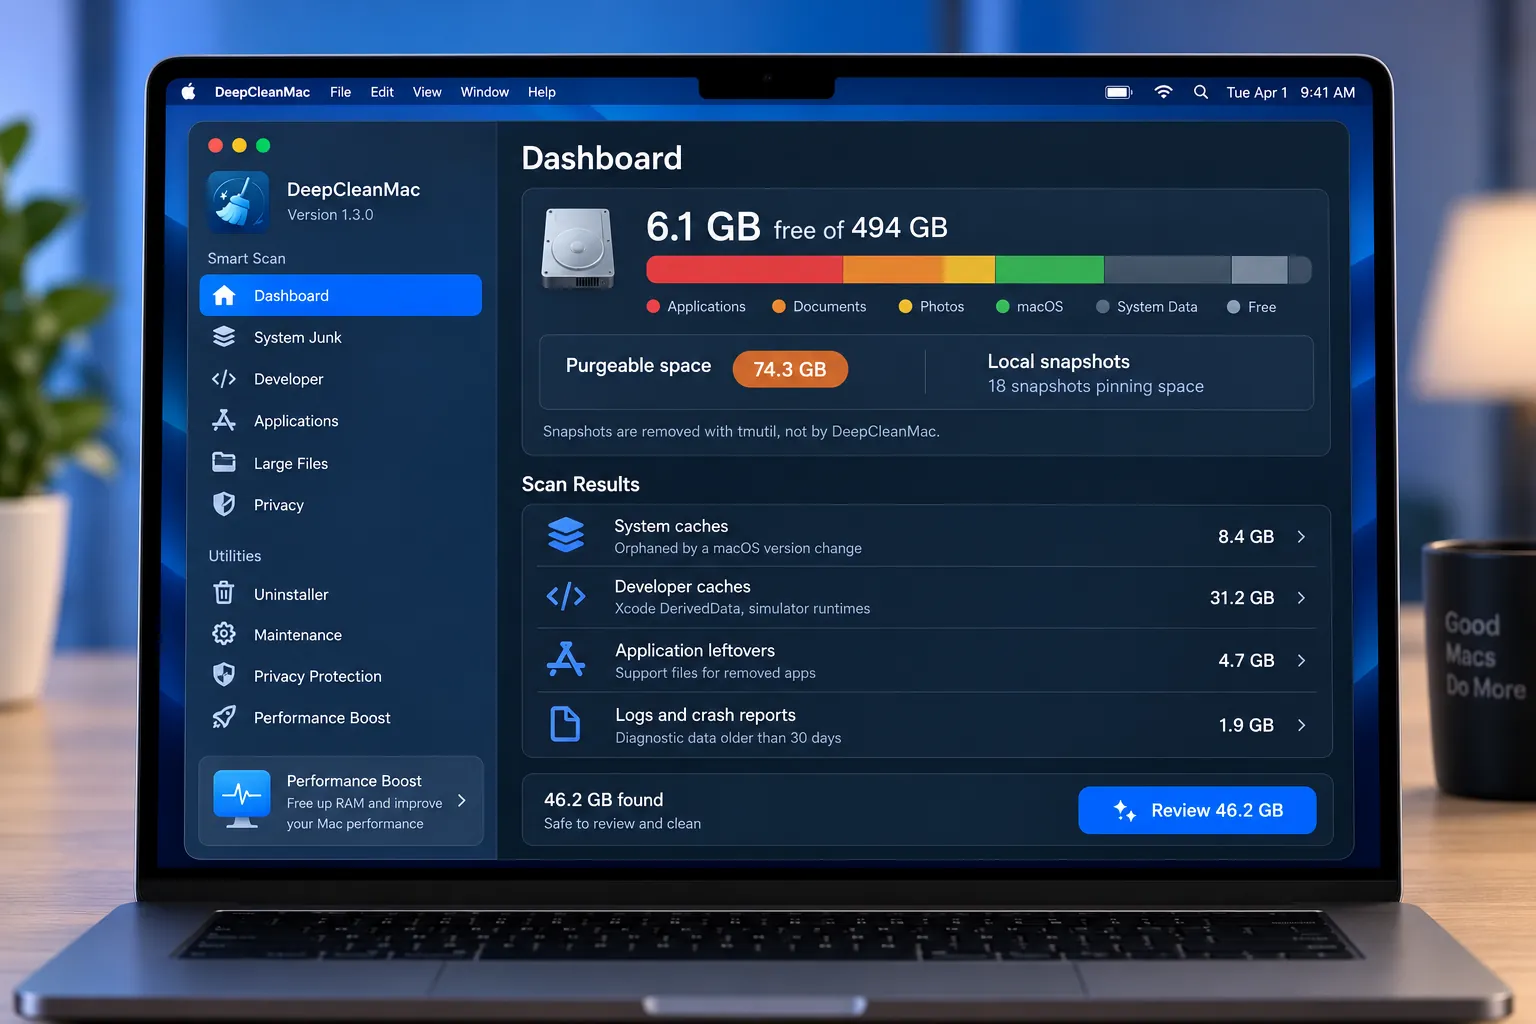
What DeepCleanMac does is tell you that snapshots are the problem, which is the part people spend hours getting wrong. The dashboard reports your purgeable space and the number of local snapshots currently pinning it, side by side with real free space. That single view answers the question this entire guide exists to answer: is the disk full of clutter, or is it full of snapshots? If it is snapshots, you need Terminal and five minutes. If it is clutter, you need a scan.
For the clutter case the coverage is the point. DeepCleanMac scans 200+ hidden system locations in under 30 seconds and shows every result with its size attached before anything is removed - orphaned caches, logs, crash reports, leftover installers, and the Application Support folders belonging to apps you deleted two upgrades ago. If you develop on the machine, the Developer section covers Xcode derived data, archives, simulator runtimes and the package-manager caches for npm, Homebrew, Cargo, Go, pip and around twenty others.
The scan is free and shows you the full list with sizes before you decide anything. A license is $5 a year or $9 for a lifetime. Download DeepCleanMac and find out which of the two problems you actually have.
Frequently Asked Questions
Is it safe to delete Time Machine local snapshots?
▾
Yes, provided you have a real backup on an external drive. Local snapshots are a convenience that lets you restore recent files when the backup drive is not connected. Deleting them costs you that convenience, not your backup history. Thin them with tmutil rather than deleting individually where possible.
Why does my Mac say it has free space but will not let me save files?
▾
Finder and System Settings count purgeable blocks as free space; the kernel does not hand those blocks to applications until it reclaims them. Run df -h / to see the real figure. If df shows far less than Finder, snapshots are holding the difference and thinning them will release it.
How do I delete all local snapshots at once?
▾
Pass a volume rather than a date: sudo tmutil deletelocalsnapshots / removes every local snapshot on the boot disk at once. Try sudo tmutil thinlocalsnapshots / 50000000000 4 first, which frees roughly 50GB at maximum urgency and keeps the newest snapshots - those are the ones that let you recover a file you deleted this morning. To remove specific ones, use tmutil deletelocalsnapshots with each timestamp from the list.
Do local snapshots delete themselves automatically?
▾
Usually. macOS keeps them about 24 hours and purges them when space runs short. But the cases that send people searching are exactly the ones where automatic purging did not happen, including snapshots that survived Time Machine being turned off. If yours have not expired, manual thinning is the fix.
Does turning off Time Machine free up the space?
▾
Not reliably, and not immediately. Disabling Time Machine stops new snapshots being created but does not always remove existing ones. Setting Backup Frequency to Manually, waiting a few minutes, then re-enabling automatic backups clears them more dependably than switching the feature off.
Why did my Time Machine backup get bigger after macOS 27?
▾
Golden Gate added roughly 10GB to what Time Machine stores, attributed to Apple Intelligence components. Measured over 38 days on an M4 Pro, the increase appeared overnight and did not come back. It is a permanent cost, separate from the 20-35GB the same assets take on your boot volume.
Can I still back up to a Time Capsule on macOS 27?
▾
No. macOS Tahoe was the last release to support Time Machine over AFP, and Golden Gate requires SMB 2 or later. AirPort Time Capsule backups no longer function. If your NAS supports an SMB-based Time Machine share, switch to it and re-select the destination.
A Mac that claims to have free space and refuses to use it is not broken and is not badly maintained - it is holding blocks for snapshots that have not expired yet. The order that works is measure, thin, then clean, and it matters in that order, because deleting files first achieves nothing for 24 hours and teaches you nothing about the cause. Start with df -h / against what System Settings reports. If the gap is large, run tmutil listlocalsnapshots / and thin with sudo tmutil thinlocalsnapshots / 50000000000 4. Then deal with the cause rather than the symptom: exclude the virtual machines and disk images that turn hourly snapshots into hundred-gigabyte ones, and check your backup drive is genuinely big enough now that Golden Gate has added its 10GB. DeepCleanMac shows your purgeable space and live snapshot count next to your real free space, so you can tell in seconds whether you have a snapshot problem or a clutter problem. Download DeepCleanMac free and find out which one you are looking at.
Free download. Scans 200+ hidden locations in seconds.