
Clean Your Mac Before Migrating to a New One: What to Delete Before Migration Assistant Copies It
Quick Answer
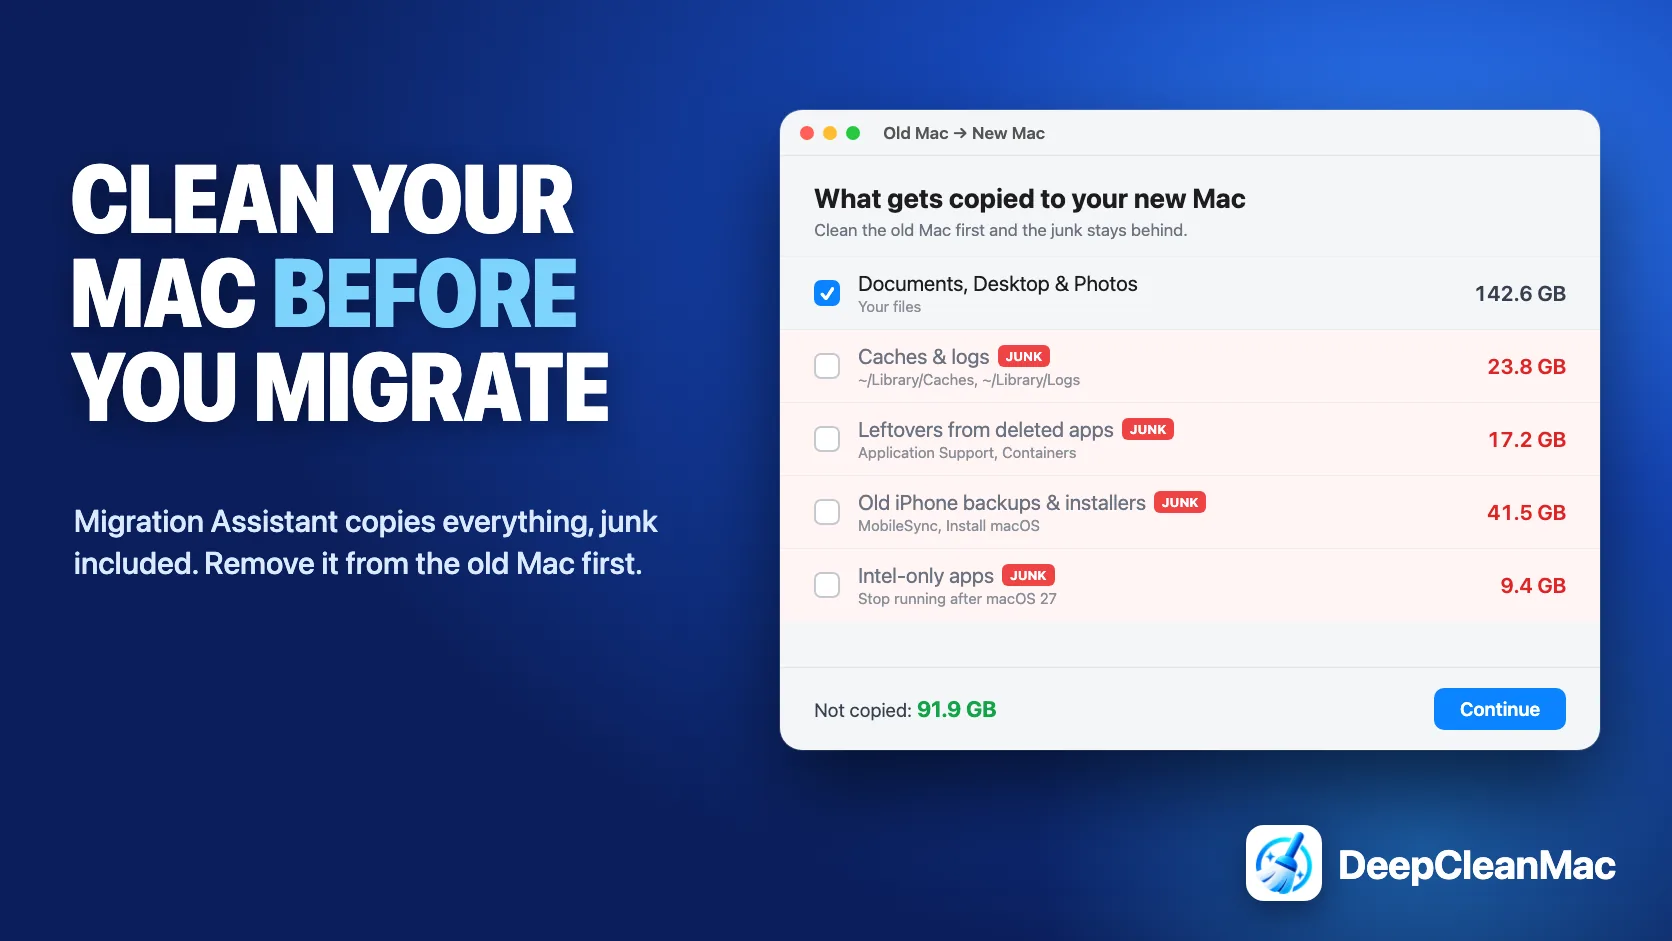
Yes, clean your Mac before migrating to a new one. Migration Assistant is a wholesale copier, not a cleaner: it moves your apps, your user accounts, your entire home folder including ~/Library, and the third-party files in /Library, so caches, leftovers from apps you deleted years ago, old iPhone backups and forgotten launch agents all arrive on the new Mac with you. Spend an hour on the old Mac first. Uninstall the apps you no longer use, including Intel-only ones that stop working after macOS 27. Delete caches, logs, leftover installers and old device backups. Review login items and background agents. Then make a fresh Time Machine backup and run Migration Assistant, unticking anything you do not need. Apple's sealed system volume is never copied, so the migration cannot drag across a broken macOS - only your own clutter.
A new Mac is the one moment you get a genuinely clean slate, and most people throw it away in the first hour. Migration Assistant asks which Mac to copy from, you click Continue, and every cache, every half-uninstalled app and every background helper you stopped thinking about in 2021 is faithfully reinstalled on hardware you just paid for.
The timing makes this worth doing properly this year. Bloomberg reports Apple plans to announce an M6 MacBook Pro on October 27, macOS 27 Golden Gate has dropped every Intel Mac, and macOS 27 is the last release where Intel-only apps run on Apple silicon at all. A lot of people are moving from an Intel Mac to an Apple silicon one in the next few months, and the gap between what they copy and what will still work has never been wider.
This guide shows you how to clean your Mac before migrating: how to measure what Migration Assistant will copy, which apps and files to remove first, which background items to check, how to migrate selectively, and how to prepare the old Mac for sale or hand-down once the move is done. You will also get a straight answer on the question underneath all of it - whether to migrate at all, or start fresh.
5 Steps to Clean Your Mac Before Migrating to a New One
Method 1: Measure What Migration Assistant Will Copy
Step 1: On the old Mac, open Apple menu > System Settings > General > Storage and wait for the bar to finish calculating. Note the Used figure.
Step 2: Open Terminal and run: du -sh ~ to see the size of your home folder. This is the bulk of what Migration Assistant transfers.
Step 3: Run: du -sh ~/Library/* 2>/dev/null | sort -h | tail -15 to list the 15 largest items inside your Library folder. Caches, Application Support, Containers and Group Containers are the usual leaders.
Step 4: Run: du -sh /Applications/* 2>/dev/null | sort -h | tail -15 to see which apps are taking the most space.
Step 5: Compare the home folder figure with the storage on the new Mac. If you are moving from a 1TB Intel MacBook Pro to a 512GB model, this is where you find out whether the migration will even fit.
Step 6: Keep the numbers. You will re-run the same commands after cleaning to see what you saved.
Migration Assistant does show sizes per category before it copies anything, but by then you are sitting in front of the new Mac with the transfer screen open, which is the wrong moment to start deciding what to delete. Measuring on the old Mac first turns a rushed setup decision into a calm one, and du reports what is actually on disk rather than the Storage pane's category estimates.
Method 2: Uninstall the Apps You Will Not Use on the New Mac
Step 1: Open Apple menu > System Settings > General > About > System Report, then choose Software > Applications in the sidebar.
Step 2: Click the Kind column to sort. Apps listed as Intel run through Rosetta on Apple silicon. Apple has said macOS 27 is the final release where Intel-only apps run on Apple silicon Macs, so each of these needs a native update or a replacement.
Step 3: Click the Last Modified column and look for apps you have not opened in a year or more.
Step 4: For each app you are dropping, quit it and check whether it ships its own uninstaller. Security software, VPN clients and drivers usually do, and using it removes their system extensions properly.
Step 5: For everything else, drag the app to the Trash, then remove its leftovers from ~/Library/Application Support, ~/Library/Caches, ~/Library/Containers, ~/Library/Preferences and ~/Library/LaunchAgents. Search each folder for the app or developer name.
Step 6: Empty the Trash.
Dragging an app to the Trash removes the app bundle and leaves everything it wrote into your Library behind, and Migration Assistant will copy those orphaned folders to the new Mac without any way to tell they no longer belong to anything. This is the step where the most dead weight disappears. If you are coming from an Intel Mac, treat every Intel-only app as a decision you have to make now rather than a problem you can defer to macOS 28.
Method 3: Delete the Files That Rebuild Themselves
Step 1: Check /Applications for a leftover Install macOS app. At around 18GB it is the single easiest win, and nothing depends on it once the upgrade is done.
Step 2: Open Finder, press Command-Shift-G and go to ~/Library/Caches. Quit open apps, then delete the contents of the folders inside it, not the Caches folder itself. Apps rebuild what they need on the new Mac.
Step 3: Go to ~/Library/Logs and delete old log files and crash reports.
Step 4: Go to ~/Library/Application Support/MobileSync/Backup to find old iPhone and iPad backups. In Finder, select your device in the sidebar and click Manage Backups to see which ones are current. Delete backups for devices you no longer own.
Step 5: Sort your Downloads folder by size and remove disk images, installers and zip files you have already used.
Step 6: If you write code, clear Xcode Derived Data at ~/Library/Developer/Xcode/DerivedData and the caches for package managers like npm and Homebrew. They regenerate on first build.
Step 7: Empty the Trash, then re-run the du commands from step 1 to see the difference.
Everything in this step is either rebuilt automatically or was only ever needed once. That is what makes it safe, and it is also what makes copying it pointless: a migrated cache is not a head start, because apps on a different chip and a different macOS build often discard and regenerate their caches anyway. You pay for the transfer time and the disk space and get nothing back.
Method 4: Check What Starts in the Background
Step 1: Open Apple menu > System Settings > General > Login Items & Extensions.
Step 2: Under Open at Login, remove anything you do not want launching on the new Mac.
Step 3: Under Allow in the Background, look for helpers from apps you have already uninstalled, or from software you no longer use. Each entry names the developer.
Step 4: In Finder, press Command-Shift-G and check ~/Library/LaunchAgents, /Library/LaunchAgents and /Library/LaunchDaemons. Each .plist file starts a background process. Files named after apps you removed are leftovers.
Step 5: Scroll down to the Extensions section in the same settings pane and review network, file system and endpoint security extensions. Old VPN, antivirus and screen-recording tools are the usual culprits.
Step 6: Remove leftovers with the vendor's uninstaller wherever one exists, and only delete a .plist by hand when you are sure which app it belongs to. Restart the Mac afterwards.
Background items are where migrations go wrong rather than just get bigger. A launch agent for an app that no longer exists fails silently on every login, and a stale network extension from a VPN you cancelled years ago can break connectivity on the new Mac in ways that are hard to trace. Apple itself tells you to turn off antivirus, firewall and VPN software on both Macs before migrating, which says a lot about how often this layer causes trouble.
Method 5: Migrate Selectively, Then Prepare the Old Mac
Step 1: Make a fresh Time Machine backup of the cleaned Mac. If anything goes wrong, this is your copy, and a smaller backup is also a faster migration source.
Step 2: Update macOS on both Macs as far as each one can go. Apple says they do not have to run the same version.
Step 3: Sign out of apps that limit how many Macs you can activate - Adobe Creative Cloud and Microsoft 365 are the usual ones - so the new Mac does not hit the limit. In the Music app, choose Account > Authorizations > Deauthorize This Computer.
Step 4: Open Disk Utility on the old Mac, select the startup disk and run First Aid. A source disk with errors is a common reason for a transfer that stalls partway through.
Step 5: Plug both Macs into power, turn off antivirus, firewall and VPN software on both as Apple recommends, and connect them with a cable if you can. Apple notes a cable is often faster than Wi-Fi.
Step 6: On the new Mac, open Migration Assistant during setup or from Applications > Utilities. When it shows the categories, click the disclosure arrow next to each one and untick anything you do not want, including individual apps.
Step 7: After the transfer, use the new Mac for a week or two before touching the old one, so you find out what is missing while it still exists.
Step 8: To sell or hand down the old Mac, open System Settings > General > Transfer or Reset > Erase All Content and Settings. On an Apple silicon or T2 Mac running Monterey or later, this signs you out of iCloud, turns off Find My and Activation Lock, and erases every account.
Migration Assistant does not delete anything from the old Mac, so the old Mac is a complete backup in its own right until you erase it. Do not rush that. When you do list it for sale, include the battery's maximum capacity and cycle count from System Settings > Battery - buyers ask, and an honest number sells a used MacBook faster than a vague one.
What Migration Assistant Copies and Whether It Should
Migration Assistant copies applications, user accounts, settings and your other files and folders. Here is what is hiding in each of those, and what to do with it before you migrate.
| What Gets Copied | Keep, Clean or Remove Before Migrating |
|---|---|
| Applications in /Applications | Keep the apps you use, remove the rest. Every app you copy is copied with its version, so an old Intel-only build arrives as an Intel-only build and runs through Rosetta until macOS 28 stops it running at all. Apps from the App Store are worth reinstalling fresh on the new Mac rather than copying, since they download as the right build for the chip. |
| Caches in ~/Library/Caches | Remove. Caches are rebuilt by the apps that made them, and on a Mac that has been in daily use for years they commonly run to several gigabytes or more. Moving to a different chip or macOS version often makes apps discard and rebuild them anyway, so copying them buys you nothing. |
| Leftovers from apps you deleted | Remove. Folders in Application Support, Containers, Group Containers and Preferences belonging to apps you dragged to the Trash long ago. Migration Assistant has no idea they are orphaned and copies them like everything else. On a Mac that has been through several macOS versions, this is often the largest category of pure dead weight. |
| Login items, launch agents and system extensions | Review carefully. These start processes in the background and are carried across with your account and the /Library folder. Helpers for apps you still use are fine. Helpers for apps you removed, and extensions from old VPN or security tools, are the most common cause of a new Mac that misbehaves from day one. |
| iPhone and iPad backups | Keep the current one, remove the rest. Local device backups in ~/Library/Application Support/MobileSync/Backup can run to tens of gigabytes each. If your iPhone already backs up to iCloud, or you have replaced the device, the local copies are just ballast. |
| Installers, disk images and Downloads | Remove. A leftover Install macOS app is about 18GB on its own, and Downloads folders collect .dmg and .pkg files that were only ever needed once. Everything here can be downloaded again if you ever need it. |
Migration Assistant Is a Copier, Not a Cleaner
It helps to know exactly what Migration Assistant does, because the name suggests more care than it takes. Apple describes it as transferring your documents, apps, user accounts and settings. In practice that means your whole home folder including the hidden ~/Library, the third-party contents of /Library, and the apps in /Applications. It does not judge any of it. A cache folder and your thesis are the same thing to it: files to copy.
What it cannot copy is macOS itself. Since Big Sur the system lives on a sealed, read-only volume protected by System Integrity Protection, and the new Mac keeps its own. That is why the old advice to always set up from scratch is weaker than it used to be - you cannot migrate a damaged operating system anymore. What you migrate is everything you added on top of it, which is exactly the part this guide cleans.
Time Machine local snapshots and purgeable space are not copied either, so do not be surprised if the new Mac reports more free space than the numbers on the old one suggested. If the old Mac had a large gap between the Storage pane and df -h, snapshots were the reason.
The Intel to Apple silicon move adds one more wrinkle. macOS 27 Golden Gate runs only on Apple silicon, and it removes Rosetta during the upgrade, offering to reinstall it the first time you open an Intel app. Apple has said macOS 27 is the final release to support Rosetta for Intel-only apps. If you migrate from an Intel Mac today, every Intel-only app you copy works now and stops working with macOS 28 next year. Cleaning before migrating is the cheapest point to find those apps, because you can see them all in one list on a machine where they still run.
Not everyone agrees you should clean first. Howard Oakley of The Eclectic Light Company suggests migrating everything and working through the new Mac afterwards, on the grounds that it is quicker and less prone to error than pruning the old one. That is reasonable advice for documents you want to sort by hand. For the junk in this guide, the old Mac is the better place. Apps uninstall most cleanly on the machine they were installed on, with their own uninstallers and their background helpers still registered. Caches are made of very large numbers of small files, and file count slows a transfer as much as total size does. And the old Mac stays intact as a fallback either way, because Migration Assistant never deletes anything from it. If you are short on time, migrate now and run the same steps on the new Mac - just do not skip them.
Migrate or Start Fresh? How to Decide
Migrate if the old Mac runs well
If your current Mac is stable, quick to boot and does not throw up odd errors, Migration Assistant is the right call. Clean it first with the steps above and you get the convenience of a full transfer without the baggage. This is the right answer for most people.
Start fresh if the old Mac has problems you cannot explain
Random crashes, login items you cannot remove, an app that has been broken since three macOS versions ago - these live in your user Library and will migrate with it. If you have problems you could never pin down, set up the new Mac as new and copy your documents across by hand.
Use the middle option most people miss
Migration Assistant lets you transfer your user account and files without the apps. Untick Applications, migrate your data, then install apps fresh from the App Store and developers' sites. You keep your documents and settings, and every app arrives as the current native build.
Let iCloud carry what it already holds
If Desktop & Documents, Photos, Passwords and Notes already sync through iCloud, a fresh setup is much less work than it sounds. Signing in brings most of it back, and what is left to move by hand is often just a few project folders.
Treat an Intel to Apple silicon move as a fresh-start candidate
Coming from an Intel Mac, more of what you migrate is stale: Intel-only apps, kernel extensions that Apple silicon handles differently, and helpers built for an architecture you are leaving. You do not have to start fresh, but you should at least migrate without applications and reinstall them.
Keep the old Mac intact for two weeks
Whichever route you choose, do not erase the old Mac the same day. Licences, browser profiles, SSH keys and app settings you forgot about only turn up when you need them. Two weeks of overlap costs nothing and saves a lot of digging through backups.
How DeepCleanMac Helps You Clean Before Migrating
DeepCleanMac does not migrate anything and it does not erase your old Mac. Migration Assistant and Erase All Content and Settings are Apple's tools for those jobs and they do them well. What DeepCleanMac does is the hour of preparation in steps 2 to 4, in a few minutes, with everything shown to you before it is removed.
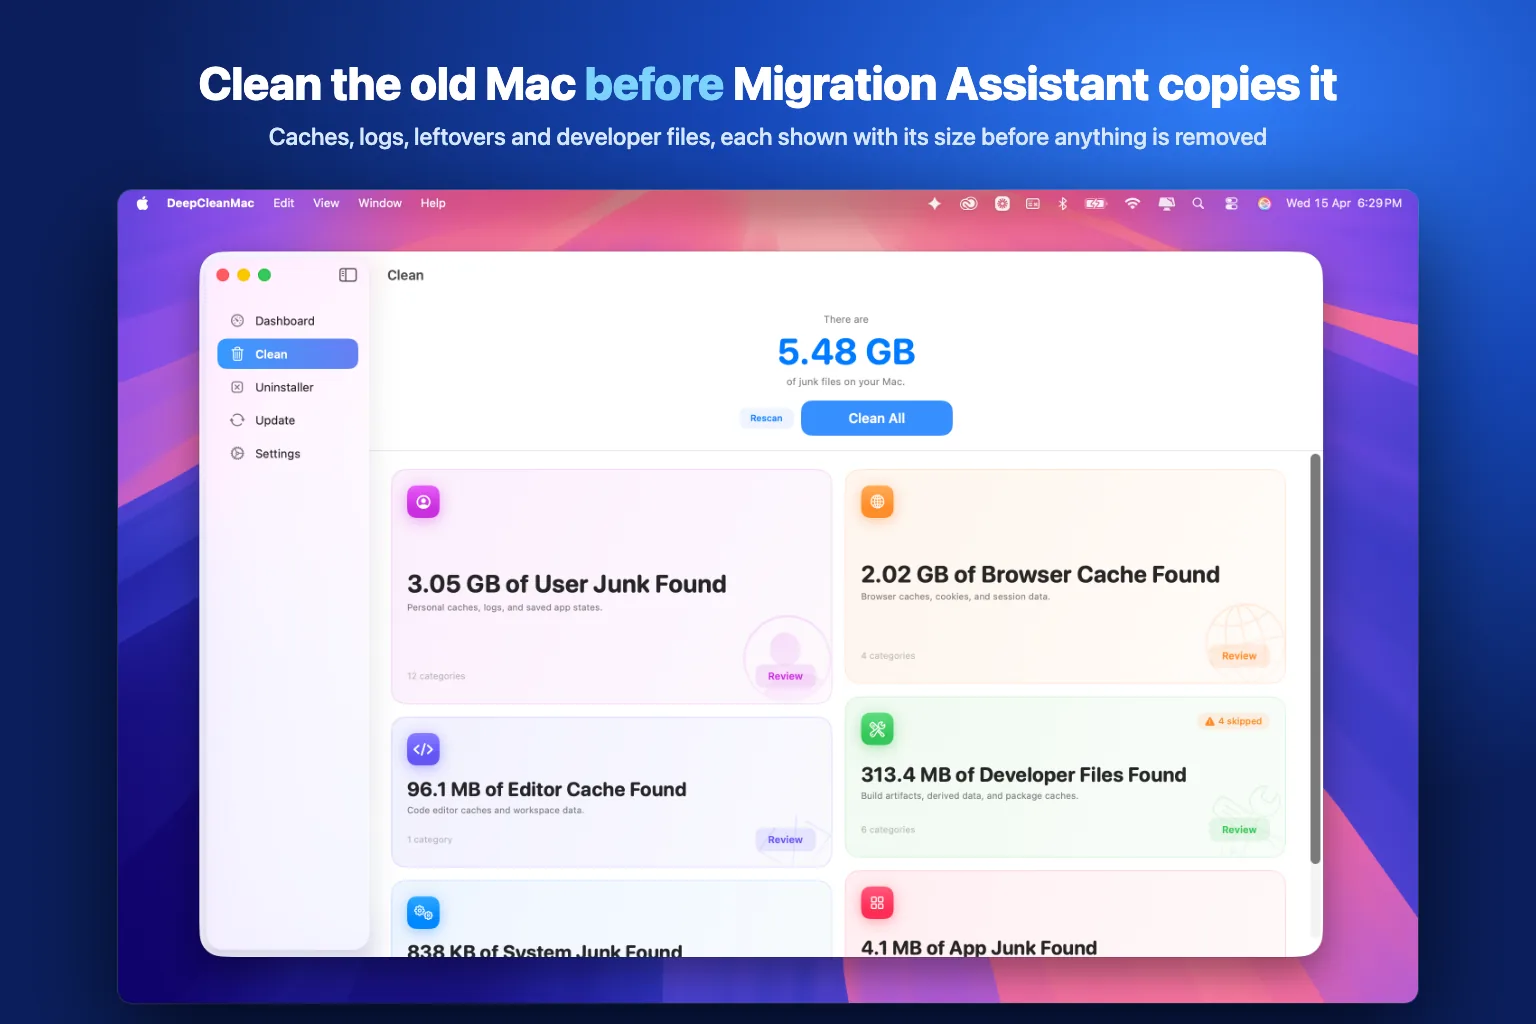
The Cleaner scans 200+ hidden locations in under 30 seconds: user and system caches, logs, crash reports, leftover installers, Mail downloads, old iOS backups and, if you develop on the Mac, Xcode derived data, simulator runtimes and the caches for npm, Homebrew, Cargo, pip and around twenty other tools. Each result shows its size, and when space is held by an app that is still running, the preview names the app to quit instead of deleting files out from under it.
The Uninstaller removes apps together with the Application Support folders, containers, preferences and launch agents they leave behind, which is the part Migration Assistant would otherwise copy across. Startup Items lists login items, launch agents and launch daemons in one place so you can see what is starting in the background before it follows you. Disk Analyzer and Duplicates find the large and repeated files the du commands point at. And when you list the old Mac for sale, System Health shows battery health and cycle count for the listing.
The scan is free and shows you the full list with sizes before you decide anything. A license is $5 a year or $9 for a lifetime. Download DeepCleanMac, clean the old Mac, and give the new one a clean start.
Frequently Asked Questions
Should I clean my Mac before using Migration Assistant?
▾
Yes. Migration Assistant copies your apps, home folder, Library and settings as they are, including caches, leftovers from deleted apps, old device backups and background helpers. Removing them first makes the transfer faster, keeps the new Mac's storage free for your own files, and stops old problems from following you to new hardware.
Does Migration Assistant transfer junk files and caches?
▾
Yes. It transfers your entire user account including the hidden ~/Library folder, so caches, logs, preferences and Application Support folders from apps you uninstalled all come across. It does not copy the macOS system volume, Time Machine local snapshots or purgeable space, so the operating system itself always starts clean.
Is it better to migrate or set up a new Mac from scratch?
▾
Migrate if your old Mac runs well and you clean it first. Start fresh if it has problems you never managed to explain, because those usually live in your user Library and migrate with it. A good middle route is migrating your account and files but reinstalling apps fresh.
Will my Intel apps work on a new Apple silicon Mac?
▾
For now, through Rosetta. macOS 27 removes Rosetta during the upgrade and offers to reinstall it when you open an Intel app. Apple has said macOS 27 is the final release where Intel-only apps run on Apple silicon, so check System Information for apps marked Intel and find native versions before macOS 28.
How long does Migration Assistant take?
▾
It depends on how much data you move, how many files it is split into, and the connection. Apple warns large transfers can take hours and may seem to pause. A cable is usually faster than Wi-Fi, and cleaning caches first cuts the file count. Expect Spotlight to keep the new Mac busy indexing for a while afterwards.
Does Migration Assistant delete data from my old Mac?
▾
No. Apple states that Migration Assistant does not delete information from the old Mac or replace macOS on the new one. Your old Mac stays exactly as it was, which makes it a full fallback copy until you decide to erase it. Keep it untouched for a week or two after migrating.
What should I do with my old Mac after migrating?
▾
Once you are sure nothing is missing, use System Settings > General > Transfer or Reset > Erase All Content and Settings. On Apple silicon and T2 Macs running Monterey or later it signs you out of iCloud, turns off Find My and Activation Lock, and erases all accounts while keeping macOS installed.
Migration Assistant will copy whatever you give it, so the quality of your new Mac's first day is decided on the old one. Measure what is there with du, uninstall the apps you are leaving behind along with their leftovers, delete the caches, installers and backups that rebuild or re-download themselves, and check what starts in the background. Then back up, migrate selectively, and keep the old Mac untouched for a couple of weeks before you erase it. If you are coming from an Intel Mac, this is also the moment to replace Intel-only apps, because macOS 27 is the last release that runs them. DeepCleanMac does the cleaning part in minutes and shows you every file with its size before anything is removed. Download it free and clean your Mac before migrating to a new one.
Free download. Scans 200+ hidden locations in seconds.