
Storage Full After the macOS 27 Golden Gate Update? Where Your Space Actually Went
Quick Answer
Losing 20-100GB right after a macOS 27 Golden Gate upgrade is expected, and a large part of it comes back without you doing anything. The permanent costs are the Apple Intelligence on-device models at roughly 7-14GB and the larger Golden Gate system itself. The temporary costs are the leftover installer package at around 18GB, APFS snapshots taken around the upgrade, Spotlight rebuilding its entire index, and iCloud re-downloading files. Before deleting anything, run df -h / in Terminal and mdutil -s / to see whether indexing is still running. Give the machine three to seven days, restart it, then delete the leftover installer and thin your local snapshots. Reinstalling macOS does not fix this and usually wastes a day.
The upgrade worked. macOS 27 Golden Gate is installed, everything launches, and then you open System Settings and find you are 60GB poorer than you were on Tahoe. System Data has swollen to something absurd, and nothing you deleted seems to make a dent.
This is the most common complaint after every major macOS release, and Golden Gate is no exception. The reports follow a pattern that goes back years. On macOS Tahoe, one user with an M4 MacBook Pro had held steady at roughly 270GB free on a 500GB drive for months, upgraded, walked away for two hours, and came back to a machine with 1.2GB left and System Data close to 300GB. Another user on Tahoe 26.2 reported 700GB of System Data, tried every disk utility and cache-clearing trick suggested to them, and recovered 12GB.
What makes this frustrating is that the usual advice does not work. You empty the Trash, clear caches, and the number does not move, because most of what you are looking at is not the kind of thing you can delete in Finder. Some of it is genuinely new data that Golden Gate needs. Some of it is temporary and will clear itself within a week. Some of it is not real at all - an accounting artifact that has been misreporting free space on APFS since High Sierra and is still doing it in Tahoe 26.6.2.
Sorting those three categories apart is the whole job. This guide covers how to measure what you actually lost, what to delete safely, what will come back on its own, and the two things that people commonly try that make the situation worse. One note before you start: if you are reading this because the upgrade never appeared for you, Golden Gate runs only on Apple Silicon. Intel Macs stop at Tahoe 26 regardless of free space.
5 Steps to Get Your Space Back After the Golden Gate Upgrade
Method 1: Measure What You Actually Lost Before Deleting Anything
Step 1: Open Terminal from Applications > Utilities.
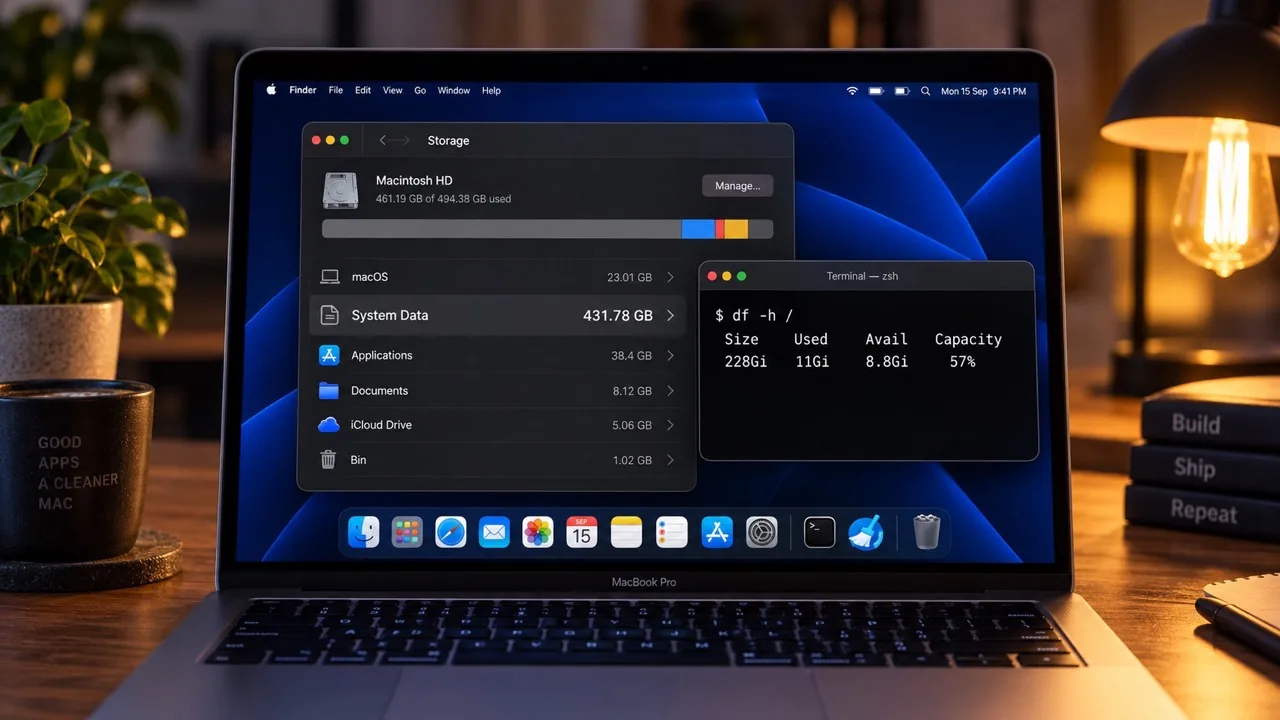
Step 2: Run: df -h /
Step 3: Read the Avail column. This is real, usable space - the figure the kernel will actually hand to an application that asks for room.
Step 4: Open Apple menu > System Settings > General > Storage and let the calculation finish. Note the free space it reports.
Step 5: Compare the two. If Finder shows far more free space than df, the difference is purgeable data, and it is almost always APFS snapshots.
Step 6: Run: mdutil -s / to check whether Spotlight is still indexing. If it reports indexing enabled and the machine is busy, a rebuild is in progress and your storage figures are moving targets.
Step 7: Write both numbers down with the date. You need a baseline to tell whether the next few days are improving things or not.
This step exists because the number that upsets people is frequently the wrong number. There is a well-documented case on macOS 26.1 where a user watched System Data claim roughly 120GB and fluctuate on its own, while Terminal showed around 11GB actually in use. Nothing was wrong with that Mac. The Storage pane was reporting garbage. Apple's own definition does not help. System Data is the catch-all for everything that is not Documents, Apps, iCloud Drive, Photos, or Other Users - it is the category formerly labelled Other. It normally sits somewhere between 5GB and 20GB. When it reads 300GB, you are looking at one of three things: real data that belongs to something identifiable, temporary data that will clear, or a reporting bug. The df command tells you which, and it takes thirty seconds.
Method 2: Let Indexing Finish, Then Restart
Step 1: Leave the Mac awake and plugged in for a few hours, ideally overnight, before you judge anything. Spotlight re-indexes the entire volume after a major upgrade.
Step 2: Check progress with: mdutil -s /
Step 3: If Spotlight is stuck rather than working, reset the index with: sudo mdutil -E / and let it rebuild once, cleanly.
Step 4: Restart the Mac. When the login window offers to reopen windows, untick that box.
Step 5: After the restart, open System Settings > General > Storage again. Opening this pane forces macOS to recalculate rather than serve a cached figure.
Step 6: Re-run df -h / and compare against the baseline you wrote down in step 1.
It sounds like the advice you give someone to make them go away, and it is still the single most effective step here. One user with a nearly full M1 MacBook Air restarted without reopening windows and went from roughly 2GB free to roughly 250GB free. The mechanism is not mysterious: the daemon responsible for reclaiming purgeable space works on its own schedule, Spotlight holds working files while it indexes, and Finder caches stale free-space figures until something forces a recalculation. The timeline worth planning around is three to seven days. Apple Support staff have told users that macOS can take days to release space after a major change, and that used, purgeable, and free space plus reboots all affect what appears in System Data. That is genuinely true here, even though it is an unsatisfying answer when your disk is nearly full today.
Method 3: Delete the Installer That Upgraded You
Step 1: Open your Applications folder and look for anything named Install macOS followed by a version name. The Golden Gate installer alone is roughly 18GB.
Step 2: Drag any installer you find to the Trash, then empty the Trash. You have already upgraded - you do not need it.
Step 3: Open Finder, press Shift + Command + G, and go to ~/Library/Updates. Delete leftover update payloads.
Step 4: Check /Library/Updates as well. This one needs your admin password.
Step 5: If you ran the Golden Gate beta at any point, check /System/Volumes/Data/.Trashes for staged installer files that were never cleared.
Step 6: Re-run df -h / to confirm the space came back.
This is the highest-yield deletion available to you and it is badly underreported. Software Update does not reliably remove the installer after a successful upgrade, and a single leftover InstallAssistant package is around 18GB. Anyone who ran the Golden Gate beta from June onwards is in a worse position, because the beta cycle staged a fresh installer for every build and those packages do not always clean themselves up. It is entirely possible to be carrying two or three of them. Even if you never touched the beta, check Applications anyway - old Tahoe and Sequoia installers sit there for years because nothing ever prompts you to remove them. One warning from the Tahoe cycle worth repeating: at least one user downloaded an installer, could not install it, deleted the installer, and still could not account for roughly 15GB afterwards. If that happens, it is staged payload in the Updates directories, which is why steps 3 and 4 exist.
Method 4: Clear the Snapshots the Upgrade Left Behind
Step 1: Confirm you have a real backup on an external drive or network volume first. Local snapshots are a convenience feature, not a backup.
Step 2: Run: tmutil listlocalsnapshots /
Step 3: Read the list. Snapshots dated around your upgrade are the ones pinning the most space, because they hold every block your Tahoe system occupied.
Step 4: Delete them all with: tmutil deletelocalsnapshots /
Step 5: To remove them one at a time instead, run tmutil listlocalsnapshotdates and then tmutil deletelocalsnapshots followed by a specific date.
Step 6: Wait a minute or two, then re-run df -h /. macOS calculates purgeable space in the background, so the figure lags the deletion.
Snapshots are the reason deleting files frees nothing. A snapshot pins the exact blocks your files occupied at the moment it was taken, so removing a file releases no space at all until every snapshot referencing it is gone. A major OS upgrade is the worst case for this, because the snapshot taken before the upgrade is holding a complete copy of your previous system. They are supposed to purge themselves automatically after 24 hours, and tmutil will cheerfully tell you they are purgeable and may be removed at any time. In practice they frequently do not. Howard Oakley of Eclectic Light documented in August 2026 that purgeable space accounting has been inconsistent and misleading since High Sierra, with reports running through Ventura and still reproducible on Tahoe 26.6.2 - eight years of the same bug. One developer lost access to 660GB to snapshots that the system refused to delete even with Time Machine switched off. So do not assume this resolved itself. Check the list.
Method 5: Clear Caches Orphaned by the Version Change
Step 1: Open Finder, press Shift + Command + G, and go to ~/Library/Caches.
Step 2: Quit the app first, then delete the contents of its specific subfolder rather than deleting folders wholesale.
Step 3: Go to ~/Library/Logs and clear old log files. Check /Library/Logs and /var/log too - runaway logs from a repeating error can reach tens of gigabytes on their own.
Step 4: Go to ~/Library/Application Support and look for folders belonging to apps you no longer have installed.
Step 5: Clear diagnostic and crash reports from ~/Library/Logs/DiagnosticReports.
Step 6: Empty the Trash and re-measure with df -h /.
A version change orphans a lot of cached data at once. Caches keyed to the previous system build are dead weight the moment you upgrade, but nothing sweeps them up - they simply sit there while new ones are written alongside. Font caches, icon caches, QuickLook thumbnails, WebKit network caches, and per-app derived data all get regenerated for the new OS while the Tahoe-era versions remain. This rarely accounts for the whole 60GB, and it is almost never zero. A Mac that has been through two or three macOS upgrades without ever being cleaned typically has between 10GB and 30GB sitting in caches, logs, and the Application Support folders of apps that were deleted years ago. The last of those is the hardest to do by hand, because nothing labels a leftover as a leftover - you are matching folder names against your memory of what you once installed.
Where the Space Actually Went
Not all of this is recoverable, and knowing which parts are saves you from chasing the parts that are not. Here is the breakdown for a typical Golden Gate upgrade, with an honest note on whether you get each one back.
| What Took the Space | Size and Whether You Get It Back |
|---|---|
| Leftover installer package | Roughly 18GB, fully recoverable. The InstallAssistant that performed your upgrade is often still sitting in Applications or staged in the Updates directories. This is the largest single item you can simply delete. |
| Apple Intelligence on-device models | Around 7GB officially, with credible user reports of 10-14GB once extra languages and image features are downloaded. Not recoverable. The models live in a root-owned folder protected by System Integrity Protection, and there is no supported way to remove them. Disabling Apple Intelligence does not reliably reclaim the space either - some users report it shrinking, others report no change. |
| APFS snapshots around the upgrade | Highly variable, from a few gigabytes to most of the drive. Recoverable with tmutil. The snapshot taken before the upgrade is holding your entire previous system, which is why this one can be enormous. |
| Spotlight index rebuild | Several gigabytes of working space, temporary. A major upgrade forces a full re-index of the volume. It clears itself once indexing completes, typically within a few hours to a few days depending on how much data you have. |
| Orphaned caches and logs from Tahoe | Commonly 10-30GB on a Mac that has been through several upgrades. Recoverable. Caches keyed to the old system build are never cleaned up automatically, and new ones are written alongside them. |
| iCloud re-sync and re-downloaded files | Varies with your library size, partly recoverable. After a major upgrade iCloud re-evaluates what to keep locally, and files that Optimize Mac Storage had offloaded can come back down. Re-enabling Optimize Mac Storage pushes them off again, gradually. |
How to Tell a Real Problem From a Reporting Bug
This is the part that separates a productive afternoon from a wasted one, because a meaningful share of System Data complaints are not storage problems at all.
The tell is a disagreement between tools. Finder and the Storage pane count purgeable space as available and lean on cached figures. Terminal does not. When System Settings insists System Data is consuming 120GB and du reports 11GB in use, the disk is fine and the display is wrong. Restarting, or simply opening the Storage pane and letting it recalculate, usually resolves the discrepancy. Nothing needs deleting.
A real problem looks different. You can find it. Point a disk visualizer such as GrandPerspective or OmniDiskSweeper at the volume and something specific and enormous shows up - a runaway log file, a virtual machine image, a Photos diagnostics bundle running several gigabytes each, a forgotten library of local AI models. If a visualizer cannot account for the missing space, you are looking at snapshots or an accounting artifact, not files.
There is a third case worth knowing about, which is that sometimes it is Apple's bug and not yours. A Jamf administrator tracked ballooning System Data across managed Macs on Sequoia, checked the logs, ran analyzers, found no snapshots, saw no change in safe mode, found nothing unusual in LaunchAgents or LaunchDaemons, and eventually reported that the 15.4 point release fixed it. The same pattern has already surfaced on Tahoe. If you have worked through everything in this guide and the number is still wrong, the correct move is to wait for 27.1 rather than to keep deleting things.
This is also why reinstalling macOS is poor advice. It is the suggestion people reach for when nothing else works, it costs the better part of a day, and it frequently changes nothing - one user carrying 260GB of System Data had already cleared caches and reinstalled the OS before asking for help. Reinstallation replaces the system volume. Snapshots, caches, and the reporting bug all live on the data volume.
Tips for the First Week on Golden Gate
Give it a week before doing anything drastic
Spotlight indexing, iCloud re-sync, and snapshot expiry all run on their own schedules and all finish within a few days. Deleting aggressively during that window means you cannot tell which of your actions helped, and you risk removing something you wanted. Measure, wait, re-measure.
Do not reinstall macOS to fix a storage number
It is the most commonly suggested fix and one of the least effective. A reinstall replaces the system volume while snapshots, caches, and leftovers all sit on the data volume, untouched. Exhaust every other option first, and treat erase-and-restore as genuinely last.
Restart before you conclude anything is wrong
Free-space figures on APFS are calculated lazily and cached aggressively. A restart forces the reclaim daemon to run and clears Finder's stale numbers. Multiple users have recovered hundreds of gigabytes from a restart alone, which is worth ruling out before you spend an evening in Terminal.
Keep 15-20% of the drive free permanently
macOS needs standing headroom for virtual memory, snapshots, and background maintenance. Below roughly 10% you get the startup disk warning; well below that, apps crash and saves fail. On a 256GB Mac that means keeping 38-50GB clear, which is a real constraint worth planning around rather than a suggestion.
Clean out old macOS installers now, not next September
The single biggest recoverable item after any upgrade is the installer that performed it. Check Applications and both Updates directories while you are already thinking about storage. Doing it now also means next year's upgrade starts from a cleaner drive.
Watch for the 27.1 point release
System Data bloat after a major release has been fixed by a point update more than once, most recently on Sequoia with 15.4. If your numbers stay wrong after everything here, note what you are seeing, keep a backup, and check again after the first maintenance release rather than escalating.
How DeepCleanMac Helps After a Major Upgrade
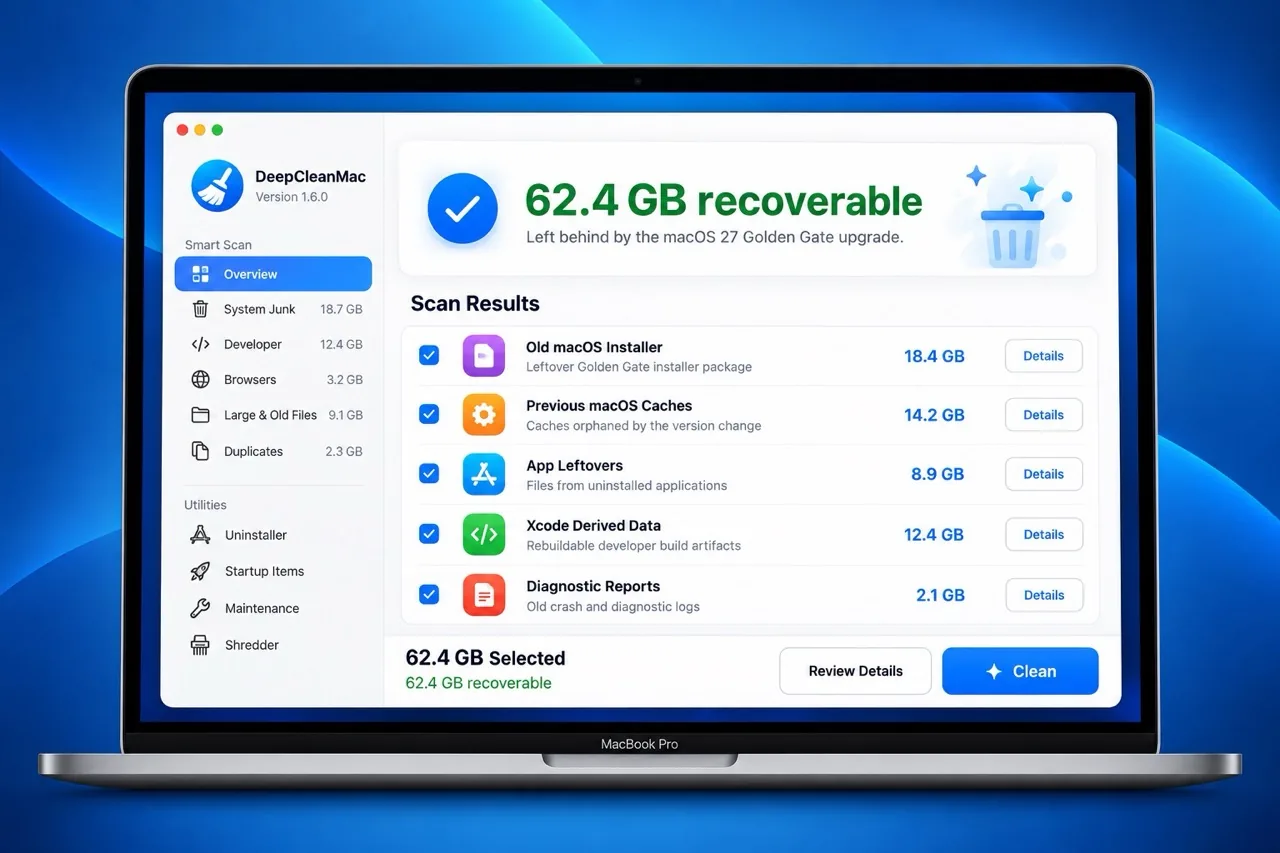
Everything above is doable by hand, and the understanding is worth having - knowing that Finder overstates free space is more useful than any tool. The tedious part is coverage. Doing method 5 properly means working through a dozen hidden Library folders, two separate Updates directories, several log locations, and then deciding which of the hundreds of folders in Application Support belong to apps you removed two upgrades ago.
DeepCleanMac scans 200+ hidden system locations in under 30 seconds and shows you what it found with sizes attached, before anything is removed. After a version change the useful categories are the ones that are hardest to find manually: stale caches keyed to your previous macOS build, orphaned Application Support and Containers folders from uninstalled apps, compressed log archives, crash and diagnostic reports, browser caches across every browser you have installed, and old installer packages. If you develop on the machine, the Developer section covers Xcode derived data, archives, simulator runtimes, and the package-manager caches for npm, Homebrew, Cargo, Go, pip and around twenty others, which routinely add up to more than everything else combined.
Two honest limits, because they matter for this particular problem. DeepCleanMac reports how many APFS local snapshots are pinning space on your dashboard, but it does not delete them - method 4 and tmutil remain the way to do that. And it clears the Apple Intelligence cache, not the on-device models themselves, which no tool can remove because SIP protects them. Anything claiming otherwise is either wrong or doing something you should not allow.
The scan is free and shows you the full list with sizes before you decide anything. A license is $5 a year or $9 for a lifetime. Download DeepCleanMac and see what the upgrade left behind.
Frequently Asked Questions
Why do I have less storage after updating to macOS 27 Golden Gate?
▾
A mix of permanent and temporary costs. Permanently, Golden Gate is a larger system than Tahoe and Apple Intelligence downloads roughly 7-14GB of on-device models. Temporarily, the installer package of around 18GB often remains on disk, APFS snapshots hold a copy of your previous system, Spotlight rebuilds its entire index, and iCloud re-downloads files it had offloaded. Expect to lose 20-100GB immediately and to get a substantial part of it back within a week.
Is it normal for System Data to be over 100GB after the upgrade?
▾
It is common, though not healthy if it stays there. System Data normally sits between 5GB and 20GB. Immediately after a major upgrade it inflates with staging files, indexing data, and snapshots. If it is still above 100GB a week later, work through the methods in this guide - and verify with df -h / first, because a well-documented reporting bug can show System Data at 120GB when only 11GB is genuinely in use.
How long until my Mac reclaims the space on its own?
▾
Three to seven days for most machines. Spotlight indexing usually finishes within hours, snapshots are meant to expire after 24 hours, and iCloud re-optimization is gradual. Apple Support has told users that macOS can take days to release space after a major change. If nothing has improved after a week, it is no longer going to happen by itself.
Can I delete the macOS 27 installer after upgrading?
▾
Yes. Once the upgrade has completed and your Mac boots normally, the installer serves no purpose and you can move it to the Trash. It is roughly 18GB, making it the largest single item you can safely remove. Also check ~/Library/Updates and /Library/Updates for staged payloads, which are not removed when you delete the installer app.
Can I remove Apple Intelligence to get the space back?
▾
No, not reliably. The on-device models live in a root-owned folder protected by System Integrity Protection, and there is no supported way to delete them on macOS 27. Turning Apple Intelligence off in System Settings sometimes reduces the footprint and sometimes does nothing. It is also unlikely to change, because Tahoe opened these models to third-party apps through the Foundation Models framework, making them a shared system resource.
Will reinstalling macOS 27 fix the storage problem?
▾
Usually not. A reinstall replaces the system volume, while snapshots, caches, leftovers and the free-space reporting bug all live on the data volume. Users have reinstalled with 260GB of System Data and seen no change. Work through measurement, snapshots, the installer, and caches first. Erase-and-restore-from-backup is a genuine last resort, not an early step.
Why does Finder show more free space than Terminal does?
▾
Because they count different things. Finder and the Storage pane include purgeable space - data macOS could release if something needed the room, mostly APFS snapshots and evictable caches - in their free-space figure. The df command reports what the kernel will actually hand over right now. When an installer or an app says there is not enough space despite Finder disagreeing, the df number is the one telling the truth.
Losing space after a major macOS upgrade is normal, and most of what you lost on day one is not gone for good. The order that works is measure, wait, then delete - and in that order specifically, because deleting before measuring means you never learn whether you had a storage problem or a reporting bug. Start with df -h / and mdutil -s /. Give the machine three to seven days and a restart. Then take the installer, which is the easy 18GB, and the snapshots, which can be far more than that. Clean the caches your previous macOS version orphaned. What remains after all of that is the genuine cost of Golden Gate plus Apple Intelligence, and the honest answer is that you do not get that part back. If the number still looks wrong a week later, wait for 27.1 rather than reinstalling - that has fixed this before. DeepCleanMac scans 200+ hidden locations in under 30 seconds and shows you every orphaned cache, log, crash report, and leftover installer with its size, before anything is deleted. Download DeepCleanMac free and see what the upgrade left behind.
Free download. Scans 200+ hidden locations in seconds.