
How to Free Up Space on Mac (5 Proven Methods)
Quick Answer
To free up space on Mac, go to Apple menu > System Settings > General > Storage and review macOS recommendations like emptying Trash and removing watched Apple TV content. Then open Finder, press Shift + Command + G, type ~/Library/Caches, and delete cache folder contents to recover 5-20GB. Uninstall apps you no longer use - but drag them to Trash AND clean leftover files from ~/Library/Application Support, ~/Library/Caches, and ~/Library/Preferences. For the fastest results, DeepCleanMac scans 200+ hidden locations and frees up 10-50GB in one click.
If your Mac is running out of space, you're not imagining it - macOS accumulates gigabytes of hidden junk that you can't see in Finder. macOS uses free disk space for virtual memory, system updates, and temporary files, so a drive with almost nothing left has less room to work with. Once your Mac gets close to full, things start to slow down: apps take longer to launch, file saves stall, and macOS updates may refuse to install entirely.
The good news is that most Macs are sitting on 10-50GB of recoverable space hiding in system caches, app leftovers from software you deleted months ago, forgotten downloads, old iOS device backups, and mail attachment caches. None of this shows up when you browse your files normally - it's buried in Library folders and system directories that macOS keeps out of sight.
This guide walks you through five proven methods to free up space on your Mac - starting with the quick wins that recover the most storage in minutes, then progressing to deeper cleanup that catches everything. Every method is tested on macOS Tahoe (26), Sequoia (15), and Sonoma (14), and works on all MacBook Pro, MacBook Air, iMac, Mac Mini, and Mac Studio models.
5 Ways to Free Up Space on Mac
Method 1: Use macOS Storage Recommendations
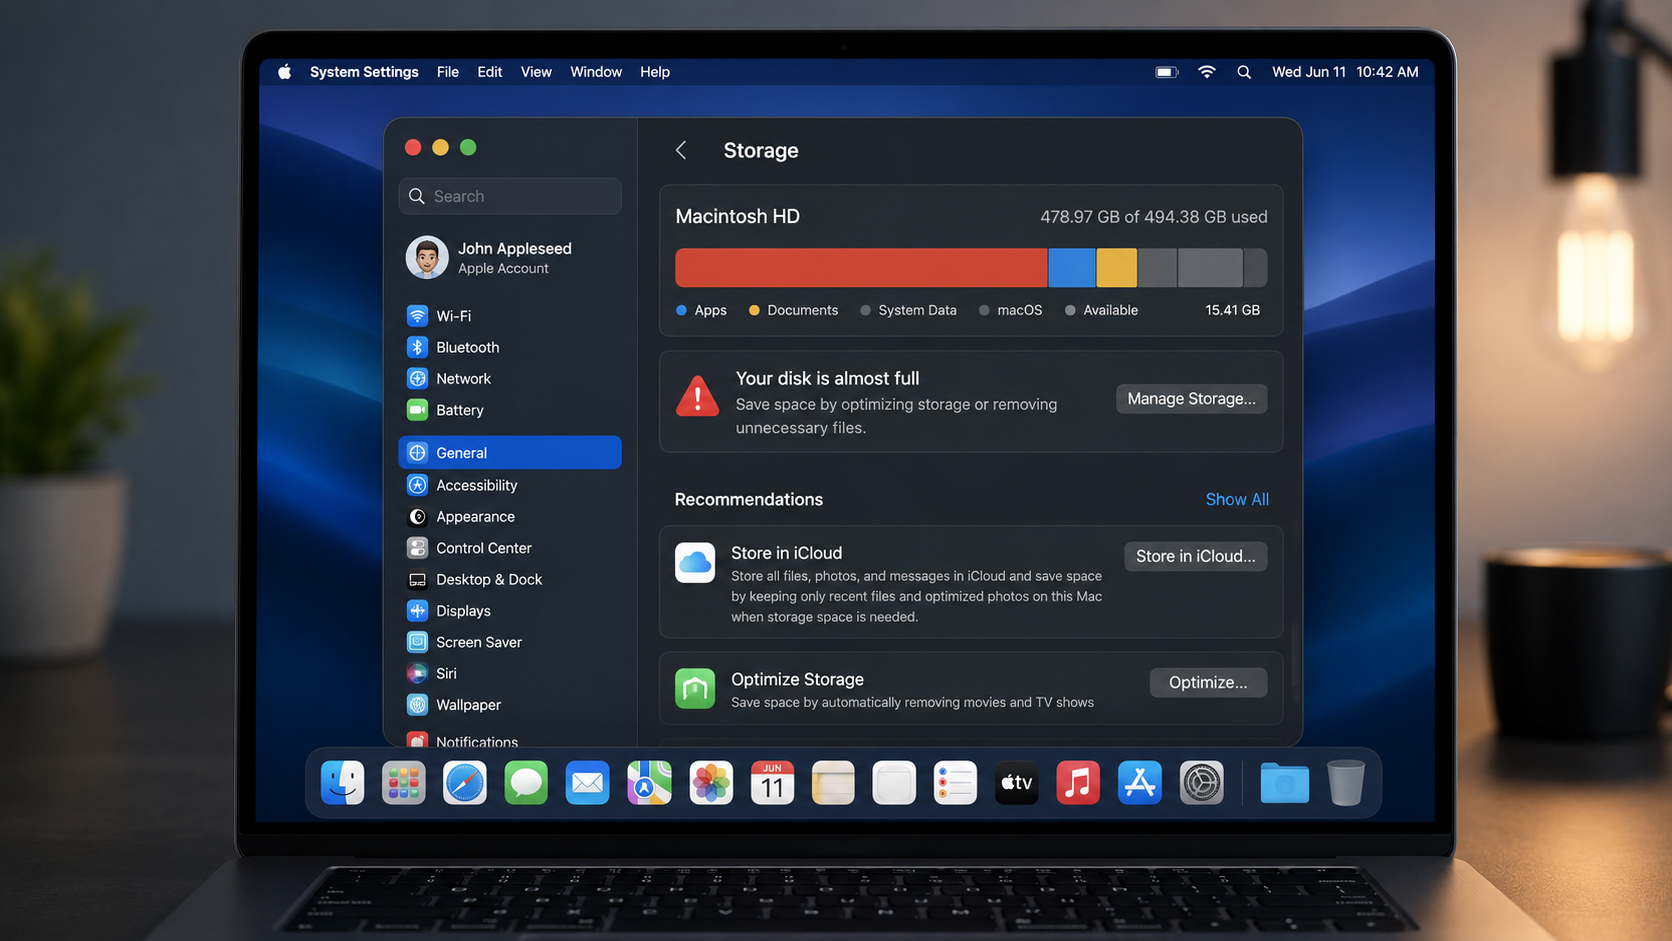
Step 1: Click the Apple menu () in the top-left corner and select System Settings.
Step 2: Click General in the sidebar, then click Storage.
Step 3: Wait for macOS to calculate your storage breakdown - you'll see a color-coded bar showing Apps, Documents, System Data, macOS, and other categories.
Step 4: Review the Recommendations section. macOS suggests actions like 'Store in iCloud,' 'Optimize Storage,' 'Empty Trash Automatically,' and 'Reduce Clutter.'
Step 5: Click 'Empty Trash Automatically' to have macOS delete Trash items older than 30 days - this alone can recover 1-5GB for most users.
Step 6: Click the info button (i) next to each storage category (Documents, Applications, etc.) to see exactly which files or apps are using the most space. Sort by size to find the biggest items first.
Apple's built-in Storage Management tool is the safest starting point because macOS only recommends actions it knows are reversible. According to Apple Support (support.apple.com/en-us/102624), the 'Store in iCloud' feature can offload Desktop and Documents files to iCloud while keeping placeholder icons locally - this alone frees 10-30GB on Macs with large document collections. For most people, Desktop and Documents hold the bulk of their working files, which makes this the highest-impact iCloud optimization to enable first. The 'Reduce Clutter' option identifies files you haven't opened in over a year and lets you review them before deleting. However, the built-in tool misses system caches, app leftovers, and hidden Library data - which is where the bulk of wasted space actually lives.
Method 2: Clear System Caches and Temporary Files
Step 1: Open Finder and press Shift + Command + G to open the 'Go to Folder' dialog.
Step 2: Type ~/Library/Caches and press Enter. This opens your user cache folder containing temporary data from every app you've ever used.
Step 3: Select all folders inside the Caches directory (Command + A), then move them to Trash (Command + Delete). Delete the contents inside the cache folders, not the cache folders themselves.
Step 4: Go back to Go to Folder (Shift + Command + G), type /Library/Caches, and press Enter. This opens the system-level cache directory.
Step 5: Delete the contents of the system cache folders - you'll need to enter your administrator password. This is safe: macOS and apps rebuild cache data automatically on next launch.
Cache files are temporary data that macOS and apps create to speed up loading times - but they never auto-clean. According to Apple Developer documentation (developer.apple.com/documentation/foundation/filemanager/searchpathdirectory/cachesdirectory), the ~/Library/Caches directory is explicitly designated for 'data that can be regenerated or downloaded again,' confirming these files are always safe to delete. Caches in ~/Library/Caches are per-user app caches that grow steadily with use, typically reaching 5-15GB on Macs that haven't been cleaned in 6+ months. According to Google's Chromium documentation (chromium.org), Chrome alone can cache 1-5GB of web assets over time, with cached images and scripts accounting for roughly 80% of browser storage usage. The /Library/Caches directory holds system-level caches including kernel caches and shared framework data, usually 1-5GB. Combined, clearing both locations recovers 5-20GB for most users. This is the single highest-impact manual cleanup step.
Method 3: Remove Unused Apps and Their Leftover Files
Step 1: Open Finder and go to Applications (Command + Shift + A). Sort by Date Last Opened to find apps you haven't used in months.
Step 2: Drag unused apps to Trash - or right-click and select Move to Trash. This removes the app binary but NOT its associated data.
Step 3: To remove leftover data, open Go to Folder (Shift + Command + G) and check these three locations for folders matching the deleted app's name:
- ~/Library/Application Support/[AppName]
- ~/Library/Caches/[AppName]
- ~/Library/Preferences/com.[developer].[appname].plist
Step 4: Delete any folders or files you find from the three locations above.
Step 5: For apps installed via Homebrew, run: brew list in Terminal to see all installed packages, then brew uninstall package-name --zap to remove an app and all its associated data.
This is one of the most misunderstood parts of Mac storage management. As Howard Oakley, macOS developer and author of The Eclectic Light Company (eclecticlight.co), explains: 'Dragging an app to the Trash removes the bundle, but macOS never cleans up the support files, containers, and preferences that the app scattered across your Library folder.' A single app can leave 500MB-5GB of leftover data behind. According to Apple Support (support.apple.com/en-us/102610), the recommended uninstall process for non-App Store apps is to check the developer's documentation for removal instructions - but most developers don't provide any. Users who have installed and deleted many apps over the years often find 5-15GB of orphaned app data in these Library folders. The three locations listed in Step 3 catch roughly 90% of leftover data. DeepCleanMac scans all Library subdirectories automatically and identifies every orphaned file from apps you've already deleted.
Method 4: Find and Delete Large Forgotten Files
Step 1: Open Finder and press Command + F to open the search bar. Make sure 'This Mac' is selected (not a specific folder).
Step 2: Click the 'Kind' dropdown and change it to 'File Size.' Set the condition to 'is greater than' and enter 500 MB.
Step 3: Press Enter to search. Finder will show all files on your Mac larger than 500MB, sorted by size.
Step 4: Look for files you no longer need: old disk images (.dmg), zip archives you've already extracted, video files, ISO files, virtual machine images, and large app installers.
Step 5: To find large files in your Downloads folder specifically, open Finder > Downloads, then click View > Sort By > Size. Most users find 2-10GB of forgotten downloads.
Step 6: Check ~/Movies for old iMovie, Final Cut Pro, or screen recording projects - video projects are often the single largest space consumers, with a single project easily exceeding 10-50GB.
Large forgotten files are the easiest storage wins because they're high-value and low-risk - deleting a 4GB DMG installer you downloaded six months ago frees meaningful space with zero system impact. The Downloads folder is usually the richest single source of these, since almost nothing ever removes files from it automatically. According to Apple's Xcode documentation (developer.apple.com), Xcode's DerivedData directory at ~/Library/Developer/Xcode/DerivedData/ can grow to 10-30GB and is safe to delete - Xcode rebuilds it on next compilation. Video editors tend to have significantly more - according to Apple's Final Cut Pro documentation, render files and optimized media can consume 2-5x the size of the original project footage. The Finder search method in Step 2 is the fastest way to surface these files without installing any tools. For a more thorough scan, DeepCleanMac identifies large files across your entire disk including hidden directories.
Method 5: Clean Up Downloads, Trash, and Mail Attachments
Step 1: Open Finder > Downloads. Select everything you no longer need and move to Trash (Command + Delete). Most users have months or years of accumulated downloads - installers, PDFs, images, and zip files.
Step 2: Empty the Trash by right-clicking the Trash icon in the Dock and selecting 'Empty Trash.' Files in Trash still consume disk space until you empty it.
Step 3: Clear Mail attachments: open Finder, press Shift + Command + G, type ~/Library/Mail Downloads, and delete the contents. This removes cached email attachments that Mail has downloaded for viewing - the attachments remain on the mail server and can be re-downloaded.
Step 4: Delete old iOS device backups: open Finder, press Shift + Command + G, type ~/Library/Application Support/MobileSync/Backup, and delete old backup folders. A single iPhone backup can be 5-30GB.
Step 5: Clear old Time Machine local snapshots if you don't use Time Machine: open Terminal and run tmutil listlocalsnapshots / to see snapshots, then tmutil deletelocalsnapshots [date] to remove specific ones.
These five cleanup targets are the most commonly overlooked storage consumers on Mac. According to Apple Support (support.apple.com/en-us/102624), Trash contents continue to occupy disk space until explicitly emptied - and many users go months without emptying Trash, accumulating 2-10GB. Mail attachments cache in ~/Library/Mail Downloads and persist even after you delete the email - heavy email users can find 1-5GB here. According to Apple's iOS backup documentation (support.apple.com/en-us/108344), iOS device backups in MobileSync/Backup can be 5-30GB each depending on the device content, and old backups from previous devices are never automatically removed. According to Apple's Time Machine documentation (support.apple.com/en-us/104984), macOS creates hourly local snapshots that persist until the Time Machine drive is reconnected - these snapshots can consume 20-50GB on Macs where the Time Machine drive hasn't been connected recently.
What Takes Up Space on Mac
macOS storage is consumed by several categories of data. Here's what each type consists of and how much space it typically wastes:
| Storage Category | What It Contains and Typical Size |
|---|---|
| System Data | Caches, logs, Time Machine local snapshots, APFS snapshots, and system temporary files. According to Apple Support (support.apple.com/guide/mac-help/storage-space-mac-syspf9b375b9/mac), System Data is a catch-all category that typically consumes 15-80GB. macOS provides no built-in way to manage it. Grows silently over time and is the most common cause of 'my Mac is full but I can't find what's using the space.' |
| App Caches | Temporary data stored by apps like Chrome, Slack, Spotify, Xcode, and Docker in ~/Library/Caches and /Library/Caches. Grows to 5-20GB over months of use. Safe to delete - apps rebuild caches automatically on next launch. |
| App Leftovers | Support files, preferences, containers, and saved state data left behind by apps you've uninstalled. Found in ~/Library/Application Support, ~/Library/Preferences, and ~/Library/Saved Application State. Typically 3-15GB on Macs where many apps have been installed and removed over time. |
| Old Downloads | Forgotten DMG installers, zip archives, PDFs, images, and other files in ~/Downloads. The average Mac user has 5-15GB of files in Downloads they no longer need. DMG disk images are especially wasteful - each one is typically 100MB-2GB. |
| Mail Attachments | Email attachments cached by Apple Mail in ~/Library/Mail Downloads. Persists even after you delete the email. Heavy email users accumulate 1-5GB of cached attachments that serve no purpose after viewing. |
| iOS Device Backups | iPhone and iPad backups stored in ~/Library/Application Support/MobileSync/Backup. According to Apple Support (support.apple.com/en-us/108344), a single backup can be 5-30GB depending on the device's content. Old backups from previous devices stack up and are never automatically deleted by macOS. |
Why Your Mac Keeps Running Out of Space
The core problem is that macOS accumulates data faster than it cleans up. Every app you install creates cache files that persist forever. Every app you uninstall leaves behind support files in Library folders. Every email attachment you preview gets cached locally. Every iOS backup you've ever made stays on disk until you manually find and delete it.
According to Apple Support (support.apple.com/en-us/102624), macOS does perform some automatic storage management - it can offload files to iCloud, delete watched Apple TV content, and purge Trash items older than 30 days (if enabled). But macOS never touches app caches in ~/Library/Caches, never cleans up after uninstalled apps, never deletes old iOS backups, and never removes the growing pile of system data in hidden Library directories. According to Apple's macOS storage optimization guide (support.apple.com/en-us/108344), the built-in 'Optimized Storage' feature only handles Trash, Apple TV content, and email attachments - it does not manage caches, logs, or application support data.
The result is predictable: a Mac that started with 200GB free gradually loses 2-5GB per month to invisible accumulation. How much accumulates depends on what you install and how long you have had the Mac, and all of it sits in Library folders that macOS conceals by default. The most common complaint on Apple Support Communities is 'my Mac says it's full but I can't find what's using the space.' That's because the space is consumed by system data, app caches, and orphaned files in directories you'd never think to check.
The five methods in this guide target every source of this invisible accumulation. Used together, they typically recover 10-50GB on Macs that haven't been cleaned in six months or more.
Tips for Keeping Your Mac Storage Clean
1. Run a storage cleanup monthly
Set a monthly reminder to check your Mac's storage and clear caches. Caches grow 1-3GB per month during normal use, and a quick monthly cleanup prevents them from consuming significant space. A 30-second scan with DeepCleanMac catches everything - caches, app leftovers, and hidden junk across 200+ locations.
2. Empty Trash regularly
Files in Trash still consume disk space. Enable 'Empty Trash Automatically' in System Settings > General > Storage to have macOS delete Trash items older than 30 days. Or make a habit of emptying Trash weekly - right-click the Trash icon in the Dock and select 'Empty Trash.'
3. Delete DMG installers after installing apps
When you download and install a Mac app from a DMG disk image, the DMG file stays in your Downloads folder forever. Each one is typically 100MB-2GB. After installing the app, delete the DMG immediately. Check your Downloads folder now - you likely have several sitting there.
4. Use 'Optimize Mac Storage' for iCloud
If you have an iCloud plan, enable 'Optimize Mac Storage' in System Settings > iCloud > iCloud Drive. This keeps old files in iCloud and stores only thumbnails locally, freeing 10-30GB on Macs with large document collections. Files download instantly when you open them.
5. Manage iOS backups
If you back up your iPhone or iPad to your Mac via Finder, old backups pile up in ~/Library/Application Support/MobileSync/Backup. Open Finder, connect your device, click 'Manage Backups' to see all stored backups. Delete backups for devices you no longer own or old backups that have been superseded by newer ones.
6. Monitor which apps consume the most space
Go to System Settings > General > Storage and click the info button (i) next to Applications. This shows every app sorted by size. You may find apps you forgot about taking up 1-5GB each. Also check ~/Library/Application Support for app data - some apps like Docker, Xcode, and Slack store significantly more data here than the app binary itself.
How DeepCleanMac Frees Up Space Safely
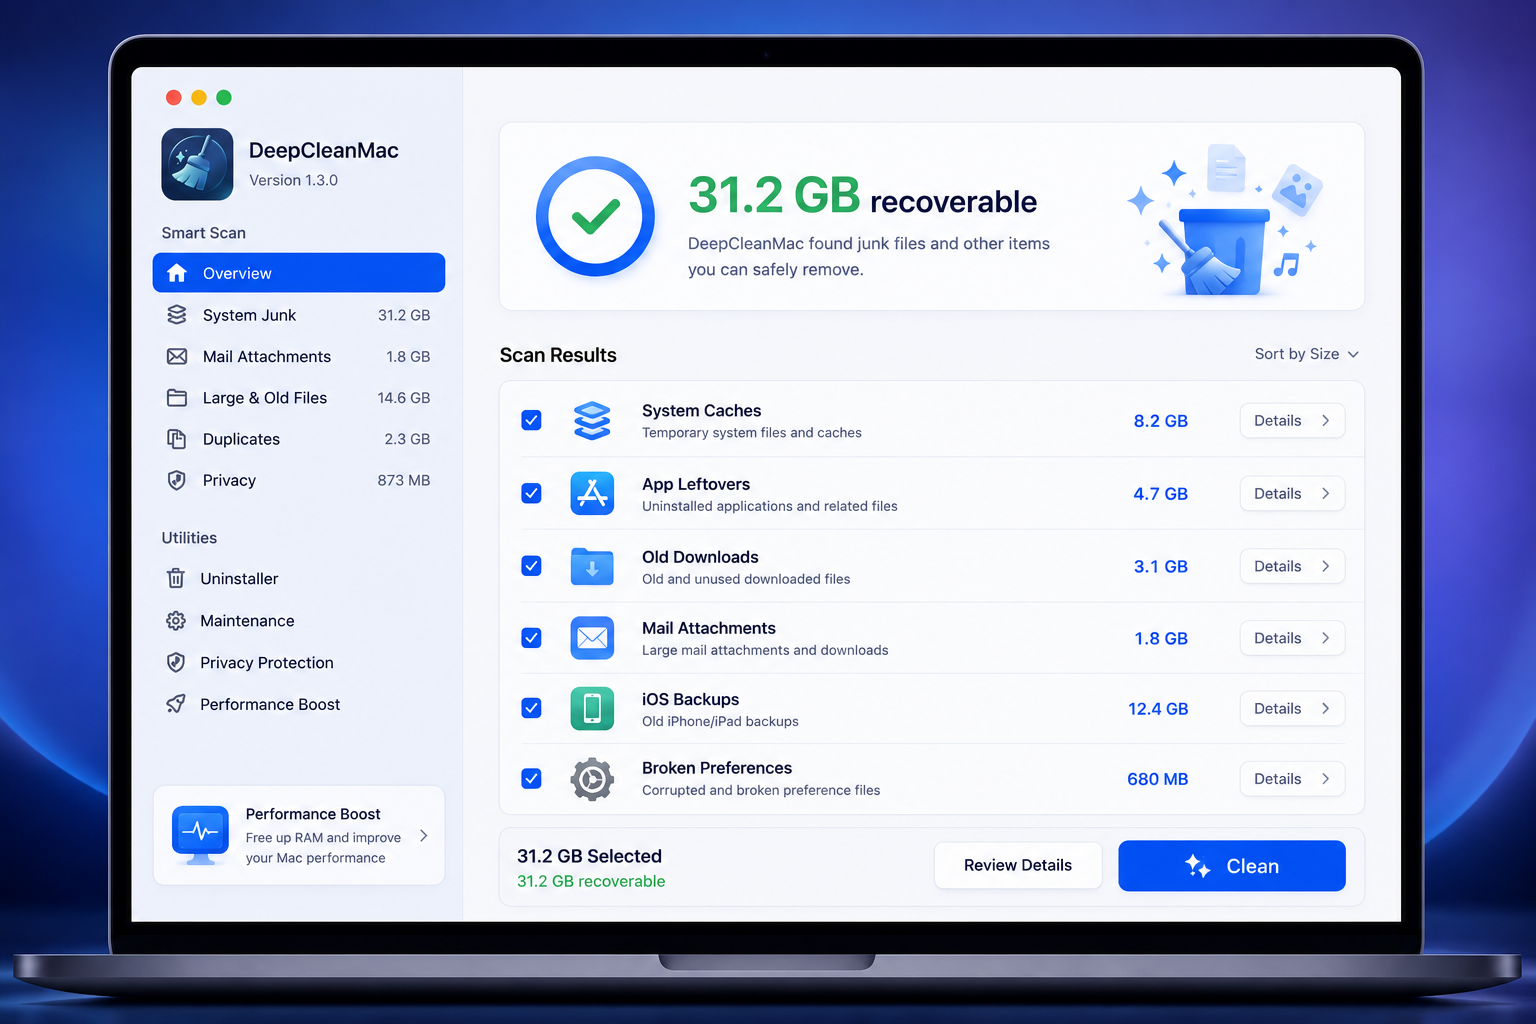
DeepCleanMac scans 200+ hidden system locations that the methods above only partially cover - including nested Library subdirectories, containerized app data, orphaned support files from apps you deleted months ago, and system data components that macOS never exposes through its built-in tools.
The five manual methods in this guide are effective but time-consuming and incomplete. Clearing ~/Library/Caches covers user app caches, but misses caches in ~/Library/Application Support, ~/Library/Containers, and /private/var/folders. Checking three Library folders for app leftovers catches 90% of orphaned data, but the other 10% hides in ~/Library/Group Containers, ~/Library/Saved Application State, and ~/Library/WebKit. Finding large files via Finder works for visible files, but doesn't surface large hidden files in system directories.
DeepCleanMac covers all of these locations in a single 30-second scan. It shows you exactly what's consuming space - with file sizes, locations, and safety ratings - and lets you clean everything with one click. How much you recover depends on what has accumulated - developers, video editors, and designers usually have the most to reclaim. Download DeepCleanMac free and see exactly how much hidden storage you can reclaim.
Frequently Asked Questions
How much space can I free up on my Mac?
▾
Most Mac users can recover 10-30GB by clearing caches, removing unused apps and their leftovers, deleting old downloads, and emptying Trash. On a Mac that has gone a year or more without a cleanup, this is usually where the bulk of the recoverable space turns out to be. Developers with Xcode, Docker, and Node.js caches can free 20-40GB from developer tools alone. According to Apple Support (support.apple.com/en-us/108344), the biggest single wins usually come from old iOS device backups (5-30GB each) and system data cleanup (15-40GB).
Is it safe to free up space by deleting Library files?
▾
Yes, as long as you delete the right files. Cache files in ~/Library/Caches and /Library/Caches are always safe to delete - macOS and apps regenerate them automatically. According to Apple Developer documentation, the Caches directory is specifically designated for files that can be safely recreated. App leftover files in ~/Library/Application Support for apps you've already uninstalled are also safe to remove. Never delete files from /System or ~/Library folders for apps you still use actively.
Why does my Mac say storage is full but I can't find what's using it?
▾
The storage is likely consumed by System Data - a catch-all category that includes caches, logs, Time Machine local snapshots, APFS snapshots, and app support files. According to Apple Support, System Data is stored in hidden Library directories that Finder doesn't show by default. Open Finder, press Shift + Command + G, and navigate to ~/Library to see these hidden folders. System Data commonly grows to 30-80GB on Macs that haven't been cleaned. DeepCleanMac scans all System Data locations and shows you exactly what's consuming space.
How often should I free up space on my Mac?
▾
We recommend a monthly cleanup for most users. According to Apple's macOS optimization guidelines (support.apple.com/en-us/102624), regular maintenance including cache management helps maintain peak system performance. Caches grow 1-3GB per month during normal use, and downloads accumulate continuously. A monthly cleanup takes 5-10 minutes manually or 30 seconds with DeepCleanMac. If you're a developer, video editor, or heavy email user, consider cleaning every two weeks - these workflows generate more temporary data. At minimum, empty your Trash weekly and clear your Downloads folder monthly.
Will freeing up space speed up my Mac?
▾
Yes, if your Mac's disk is nearly full. macOS uses free disk space for virtual memory, temporary files, and system operations, so a nearly full drive leaves it less room to work. Freeing up space on a disk that is close to full often produces a noticeable improvement. If your disk has plenty of free space, cleanup won't change speed - but it prevents future slowdowns.
Does emptying Trash permanently delete files?
▾
Yes. Once you empty Trash, the files are permanently removed and cannot be recovered through normal means. Before emptying Trash, review its contents by clicking the Trash icon in the Dock. If you accidentally delete an important file, recovery software like Disk Drill may be able to recover it - but only if the disk sectors haven't been overwritten. For important files, always maintain a backup using Time Machine or iCloud before performing any cleanup.
What is the fastest way to free up space on Mac?
▾
The fastest manual method is to empty Trash (right-click Trash icon > Empty Trash) and delete old Downloads (open Finder > Downloads, sort by size, delete large files you don't need). These two steps alone typically recover 3-10GB in under two minutes. For a more thorough cleanup, DeepCleanMac scans 200+ hidden locations in 30 seconds and identifies 10-50GB of recoverable space - caches, app leftovers, system data, and hidden junk that manual methods miss.
Your Mac is almost certainly hiding 10-50GB of recoverable space in system caches, app leftovers, forgotten downloads, old iOS backups, and mail attachment caches. The five methods in this guide give you complete control over every source of wasted storage - from the quick macOS Storage Recommendations that handle the obvious wins to the deep Library cleanup that catches the hidden junk. The most impactful steps are clearing caches (5-20GB), removing app leftovers (3-15GB), and deleting old iOS backups (5-30GB each). For the fastest and most thorough results, DeepCleanMac scans 200+ hidden locations and clears them safely in one click, showing you every item with its size first. Download it free and see exactly how much hidden storage is waiting to be reclaimed on your Mac.
Free download. Scans 200+ hidden locations in seconds.