
macOS 27 Golden Gate Storage Requirements: How Much Free Space You Actually Need
Quick Answer
macOS 27 Golden Gate needs roughly 35.5GB of free space as a stated minimum, but plan for 60GB. The installer package alone is about 18GB, and macOS needs room on top of that to unpack files, stage the new system, and preserve your old one. Before you start, check your real free space with df -h / in Terminal rather than trusting Finder, because Time Machine local snapshots are counted as available when they are not. Then delete old macOS installers and beta leftovers, thin your local snapshots, clear caches and app leftovers, and move large files off the startup disk. To clear the hidden caches, logs, and leftovers that are hardest to find by hand, use DeepCleanMac.
macOS 27 Golden Gate is here, and the single most common reason an upgrade fails is the one nobody plans for: not enough disk space. Apple has been unusually quiet about the exact requirement. The figure circulating across the Mac press is 35.5GB, but the recommendations you will find range wildly - OS X Daily says 30GB, Donemax says 35-40GB, Nektony says 40GB, and for the beta some guides pushed 50GB. Two pages on the same site can give you two different numbers. That is not helpful when Software Update is already stalled at 90%. Here is what is actually going on. The InstallAssistant package is roughly 18GB on its own, but the installer needs far more than its own size to work. During installation macOS unpacks the package, caches data, writes temporary setup files, and keeps your previous system intact until the new one boots successfully. That staging space is why an install can sail through the download and then fail halfway. There is a second trap that catches even people with plenty of room. Finder and System Settings count Time Machine local snapshots and other purgeable data as free space, so your Mac can report 200GB available while the installer sees almost nothing. One tester hit exactly this and found Terminal reporting 83.62GB of 90.9GB used - the culprit was old macOS 27 beta installers that had never been cleaned up. This guide walks through five methods to free up space for macOS 27 Golden Gate, starting with how to measure what you really have. One thing to check before anything else: macOS 27 Golden Gate runs only on Apple Silicon. If your Mac has an Intel processor, no amount of free space will make the update appear, and macOS Tahoe 26 is the end of the line for your machine.
5 Ways to Free Up Space for macOS 27 Golden Gate
Method 1: Measure Your Real Free Space (Not What Finder Shows)
Step 1: Open Terminal from Applications > Utilities, or search for it with Spotlight.
Step 2: Run: df -h /
Step 3: Look at the Avail column. This is the space the kernel will actually hand to the installer.
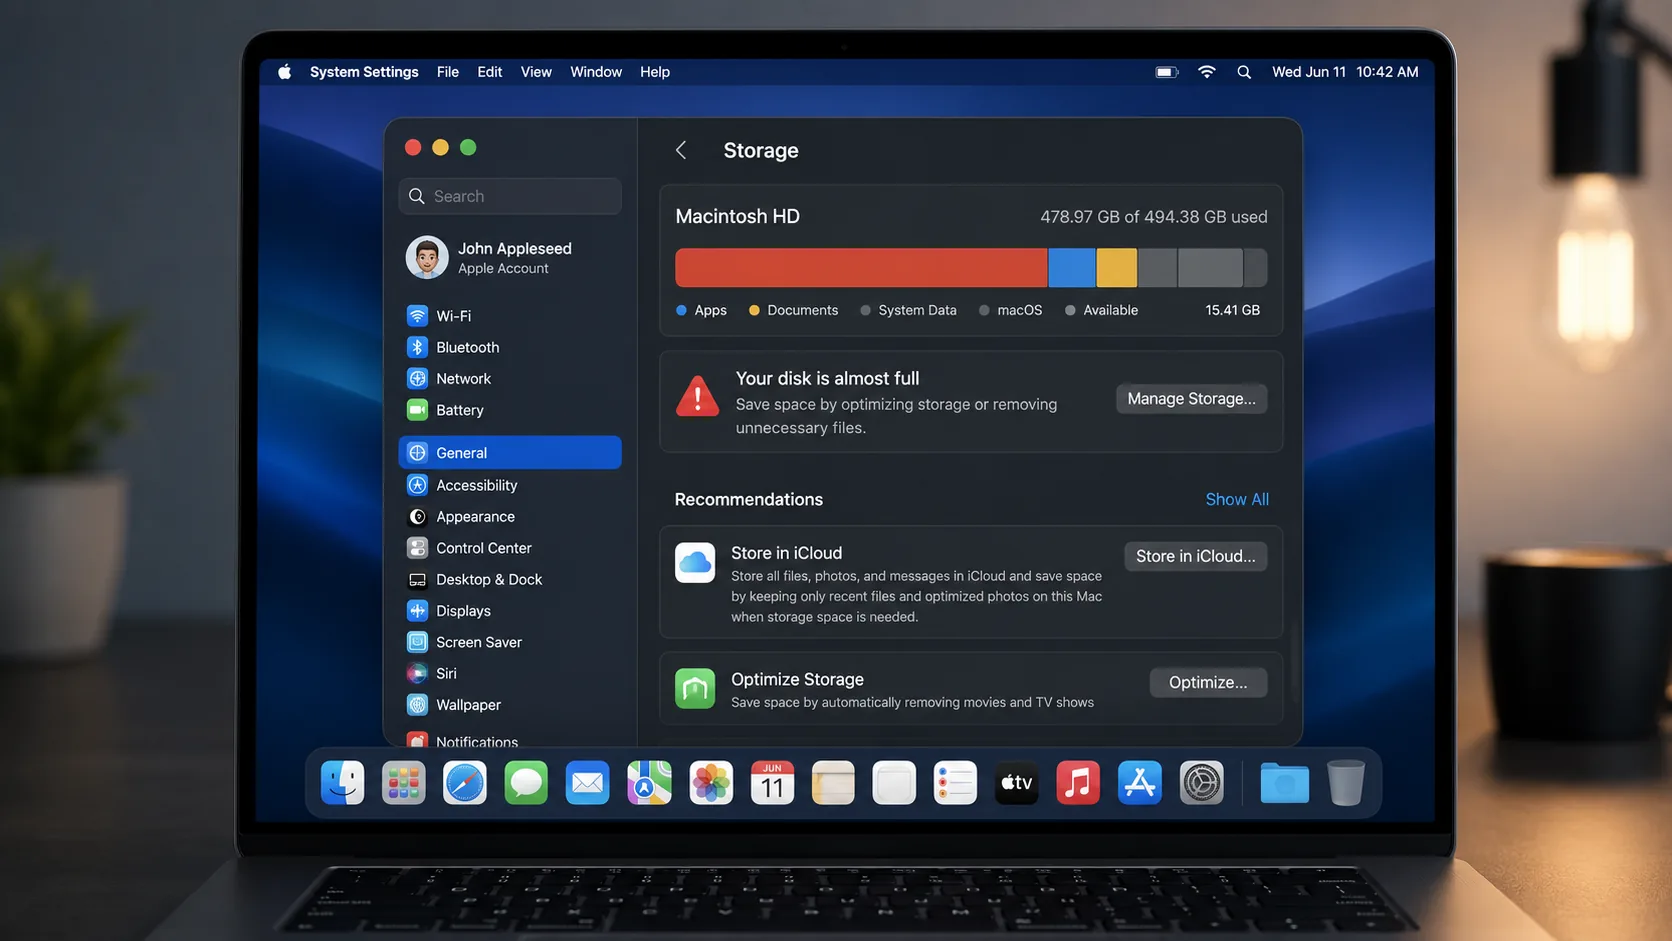
Step 4: Now open Apple menu > System Settings > General > Storage and note the free space Finder reports.
Step 5: Compare the two numbers. A large gap means the difference is purgeable data, and it is almost always Time Machine local snapshots.
Step 6: List them to confirm: run tmutil listlocalsnapshots / to see every snapshot currently pinning space on your startup disk.
This step takes thirty seconds and it changes what you do next. On APFS, free space has two parts: genuinely free blocks, and purgeable blocks that macOS promises it can release on demand. Finder counts both as available. The installer does not. This is the single most common reason people report the maddening combination of plenty of free space and a Software Update that insists there is not enough. If df -h and Finder agree, your problem is ordinary clutter and methods 4 and 5 will solve it. If they disagree by tens of gigabytes, go straight to methods 2 and 3 - you may not need to delete a single personal file.
Method 2: Delete Old macOS Installers and Beta Leftovers
Step 1: Open your Applications folder and look for any file named Install macOS followed by a version name. Each one is roughly 12-18GB.
Step 2: Drag any installer you are not about to use to the Trash, then empty the Trash.
Step 3: Open Finder, press Shift + Command + G, and go to ~/Library/Updates - delete leftover update payloads you find there.
Step 4: Check /Library/Updates as well. You will need your admin password to clean this one.
Step 5: If you ran any macOS 27 Golden Gate beta, look for staged installer files in /Library/Updates and /System/Volumes/Data/.Trashes and clear them.
Step 6: Re-run df -h / to confirm the space actually came back.
This is the highest-yield step for anyone who has been running the Golden Gate beta since June, and it is badly underreported. The beta cycle was long, macOS staged a fresh installer for each build, and those packages do not always clean themselves up. A single leftover InstallAssistant is roughly 18GB - enough on its own to take a comfortable upgrade and turn it into a failure at 90%. The tester who found 83.62GB of 90.9GB used on their drive recovered the room they needed purely by deleting old beta installers, without touching a single document or photo. If you never ran the beta, still check the Applications folder. Old Tahoe and Sequoia installers sit there for years because nothing ever prompts you to remove them.
Method 3: Thin Time Machine Local Snapshots
Step 1: Make sure you have a real backup on an external drive or network volume first. Local snapshots are a convenience layer, not a backup.
Step 2: Open Terminal and run: tmutil listlocalsnapshots /
Step 3: Note the snapshot dates listed. Each one pins the exact disk blocks your files occupied when it was taken.
Step 4: Reclaim space in bulk: run tmutil thinlocalsnapshots / 40000000000 4 to free roughly 40GB at the highest urgency level.
Step 5: To remove a specific snapshot instead, run: sudo tmutil deletelocalsnapshots [date] using a date from the list.
Step 6: Run df -h / again. The Avail figure should now be much closer to what Finder reports.
Snapshots are why deleting files often frees nothing. A snapshot holds onto the blocks a file occupied, so the space does not return until every snapshot referencing that file is gone. macOS takes them hourly and keeps them for around 24 hours by default, longer while space allows, and they can grow to occupy a large share of the disk. Apple's position is that you should never need to think about this, because snapshots are purged automatically when space is needed. In practice that promise does not always hold. The Eclectic Light Company noted in August 2026 that snapshots made by Time Machine sometimes will not purge and are not reported reliably as purgeable space. Apple's developer forums carry reports of users locked out of hundreds of gigabytes with snapshots that refused to clear even after Time Machine was switched off. Thinning them manually is the reliable fix.
Method 4: Clear Caches, Logs, and App Leftovers
Step 1: Open Finder, press Shift + Command + G, and navigate to ~/Library/Caches.
Step 2: Delete the contents of the folder with Command + A then Command + Delete. Do not delete the Caches folder itself.
Step 3: Repeat for /Library/Caches, the system-level cache folder. You will need your admin password.
Step 4: Clear archived system logs: open Terminal and run: sudo rm -rf /var/log/*.gz /var/log/*.bz2 /var/log/*.old
Step 5: Check ~/Library/Application Support and ~/Library/Containers for folders belonging to apps you deleted long ago - these leftovers survive dragging an app to the Trash.
Step 6: Empty the Trash, then restart your Mac so macOS releases the files it had open.
Caches and leftovers are the quiet middle of the problem: rarely the whole 40GB, almost never nothing. A Mac that has been upgraded through two or three macOS versions typically carries several gigabytes of caches the current system no longer reads, plus Application Support folders from apps uninstalled months ago. Dragging an app to the Trash removes the app and leaves everything else behind, which is why these folders accumulate for years without anyone noticing. The restart in step 6 matters more than it looks. macOS holds many cache files open, and the space they occupy is not returned until the processes using them exit. Deleting caches and then immediately checking free space is how people conclude, wrongly, that cleaning did nothing.
Method 5: Move Large Files Off the Startup Disk
Step 1: Open Apple menu > System Settings > General > Storage and wait for the calculation to finish.
Step 2: Click the information icon next to Documents and sort by size to find your largest files.
Step 3: Clear out Downloads - it is usually the fastest large win, and almost nothing in it is irreplaceable.
Step 4: Move finished video projects, disk images, and virtual machine files to an external drive.
Step 5: If you use iCloud, turn on Store in iCloud under Recommendations to offload files you rarely open.
Step 6: Empty the Trash and confirm with df -h / that you have cleared your target before starting the upgrade.
Leave this until last, because it is the only method that asks you to give something up. Methods 1 through 4 remove files that serve no purpose; this one removes files you may want back. Downloads is the exception and deserves a look first - most Macs carry several gigabytes of installers, ZIP archives, and PDFs nobody will open again. One caution on Optimize Mac Storage and Store in iCloud: both help before an upgrade, but they also make your free-space reading less stable, since macOS offloads and re-downloads files in the background. If you are troubleshooting a stubborn installer that keeps failing, turn them off temporarily so the number you are looking at holds still.
Where macOS 27 Golden Gate's Storage Requirement Actually Goes
The gap between the 18GB download and the 60GB recommendation confuses people, and the confusion is reasonable - nobody explains where the rest goes. Here is the breakdown of what the installer needs and why the stated minimum leaves you no margin.
| Storage Requirement | Size and Details |
|---|---|
| InstallAssistant package | Roughly 18GB. This is the download itself, and it is the only number most people see before they start. It sits on your disk in full while the install runs. |
| Unpacking and staging space | Roughly 10-15GB. macOS decompresses the package, writes temporary setup files, and stages the new system volume. This is invisible, temporary, and the usual reason an install fails partway through rather than refusing to start. |
| Your preserved previous system | Varies, often 5-15GB. macOS keeps the old system intact until the new one boots successfully. This is a safety feature, and it means both systems briefly coexist on the same disk. |
| Time Machine local snapshots | Highly variable, from a few GB to most of the disk. Counted as free by Finder but unavailable to the installer. The most common cause of the not enough space error on a Mac that looks empty. |
| Apple Intelligence on-device models | Around 7GB officially, with user reports above 14GB once extra languages and image features are added. Filed under System Data, downloaded after the upgrade, not before - so it does not block the install but it does consume the headroom you thought you had. |
| Post-install working headroom | 15-20% of your drive as a standing target. Spotlight re-indexes the entire volume after a major upgrade and iCloud re-syncs metadata, both of which need room to work. A Mac that finishes the install at 2GB free will be slow for days. |
Why Every Site Gives You a Different Number
Search for the macOS 27 Golden Gate storage requirement and you will get 30GB, 35GB, 35.5GB, 40GB, 50GB, and 60GB, sometimes from two pages on the same website. It is worth understanding why, because the spread is not carelessness - the sources are answering different questions.
The low numbers are usually the stated minimum: the point below which the installer refuses to begin. The figure circulating for Golden Gate is 35.5GB, and OS X Daily's preparation guide puts the practical floor at 30GB. A minimum is not a recommendation. It is the edge of the cliff, and it assumes nothing else on your system needs room while the upgrade runs. The higher numbers come from people who have actually watched installs fail. For macOS Tahoe, one tester recommended at least 40GB after an install died halfway through with 28GB free, and only succeeded after clearing more room. Guides written during the Golden Gate beta pushed 50GB, partly because beta builds arrive every few weeks and each one stages its own installer.
There is a second reason the numbers disagree, and it is the more interesting one. Almost none of these sources specify whether they mean free space or available space, and on APFS those are different quantities. A guide that says you need 40GB free is giving you useful advice only if you measure the same way it does. If you check in Finder and it counts 30GB of local snapshots as available, you can satisfy a 40GB recommendation on paper and still fail the install. This is why method 1 comes first in this guide. Measuring correctly matters more than which recommendation you follow.
Our recommendation: clear 60GB before you start. That covers the 18GB package, the staging space, your preserved previous system, and leaves genuine working headroom for Spotlight to rebuild its index afterward without your Mac crawling for a week. If 60GB is not realistic on your drive, 40GB of real free space measured with df -h / will get you through the install - you will just want to keep cleaning afterward.
Tips for a Clean macOS 27 Golden Gate Upgrade
Check Apple Silicon compatibility before anything else
macOS 27 Golden Gate is the first release to run exclusively on Apple Silicon. Every Intel Mac is excluded, no exceptions and no workaround. If the update is not appearing in Software Update, check Apple menu > About This Mac before you spend an afternoon clearing space you do not need to clear. Golden Gate is also the last release with full Rosetta 2 functionality, which matters if you still depend on Intel-only apps.
Back up before you upgrade, not after
If you upgrade without a full backup and need to roll back, the path is unpleasant: erase the disk from Recovery, reinstall Tahoe, and restore your data by hand. A Time Machine backup to an external drive takes an hour and removes that risk entirely. Do this before you delete local snapshots in method 3, since those snapshots are the only on-disk recovery layer you have until a real backup exists.
Clear the space before you start the download
Software Update does not always warn you clearly about low disk space. Sometimes it stalls, sometimes it fails partway through, and sometimes it downloads 18GB before telling you there is no room to install it. Clearing space first is far less painful than recovering from a half-finished upgrade with a full disk.
Let the post-install indexing finish
For the first few hours or days after upgrading, Spotlight rebuilds its entire search index while iCloud re-syncs metadata. Your Mac will feel slow and System Data will look inflated. This is expected. Do not start deleting things in a panic - check again after a couple of days with a restart in between, and see whether the number settles on its own.
Keep 15-20% of your drive free permanently
macOS needs standing headroom to manage virtual memory, snapshots, and background maintenance. Running an APFS volume to genuinely zero free space is the one scenario worth actively avoiding - the volume can become difficult to write to at all, which makes deleting files to recover awkward precisely when you need it most.
Clean up again a week after upgrading
The upgrade leaves debris: the installer package if it was not removed automatically, caches from Tahoe that Golden Gate no longer reads, and snapshots taken during the transition. Apple Intelligence also downloads its on-device models after the upgrade rather than before. Checking a week later usually recovers another several gigabytes.
How DeepCleanMac Helps You Clear Space for macOS 27
The methods above work, and you should understand them - knowing that Finder lies about free space is worth more than any tool. But doing all five by hand means navigating to half a dozen hidden Library folders, checking two separate Updates directories, and knowing which of the thousands of files in ~/Library/Application Support belong to apps you deleted two years ago. That last one is genuinely hard to do manually, because nothing labels a leftover as a leftover.
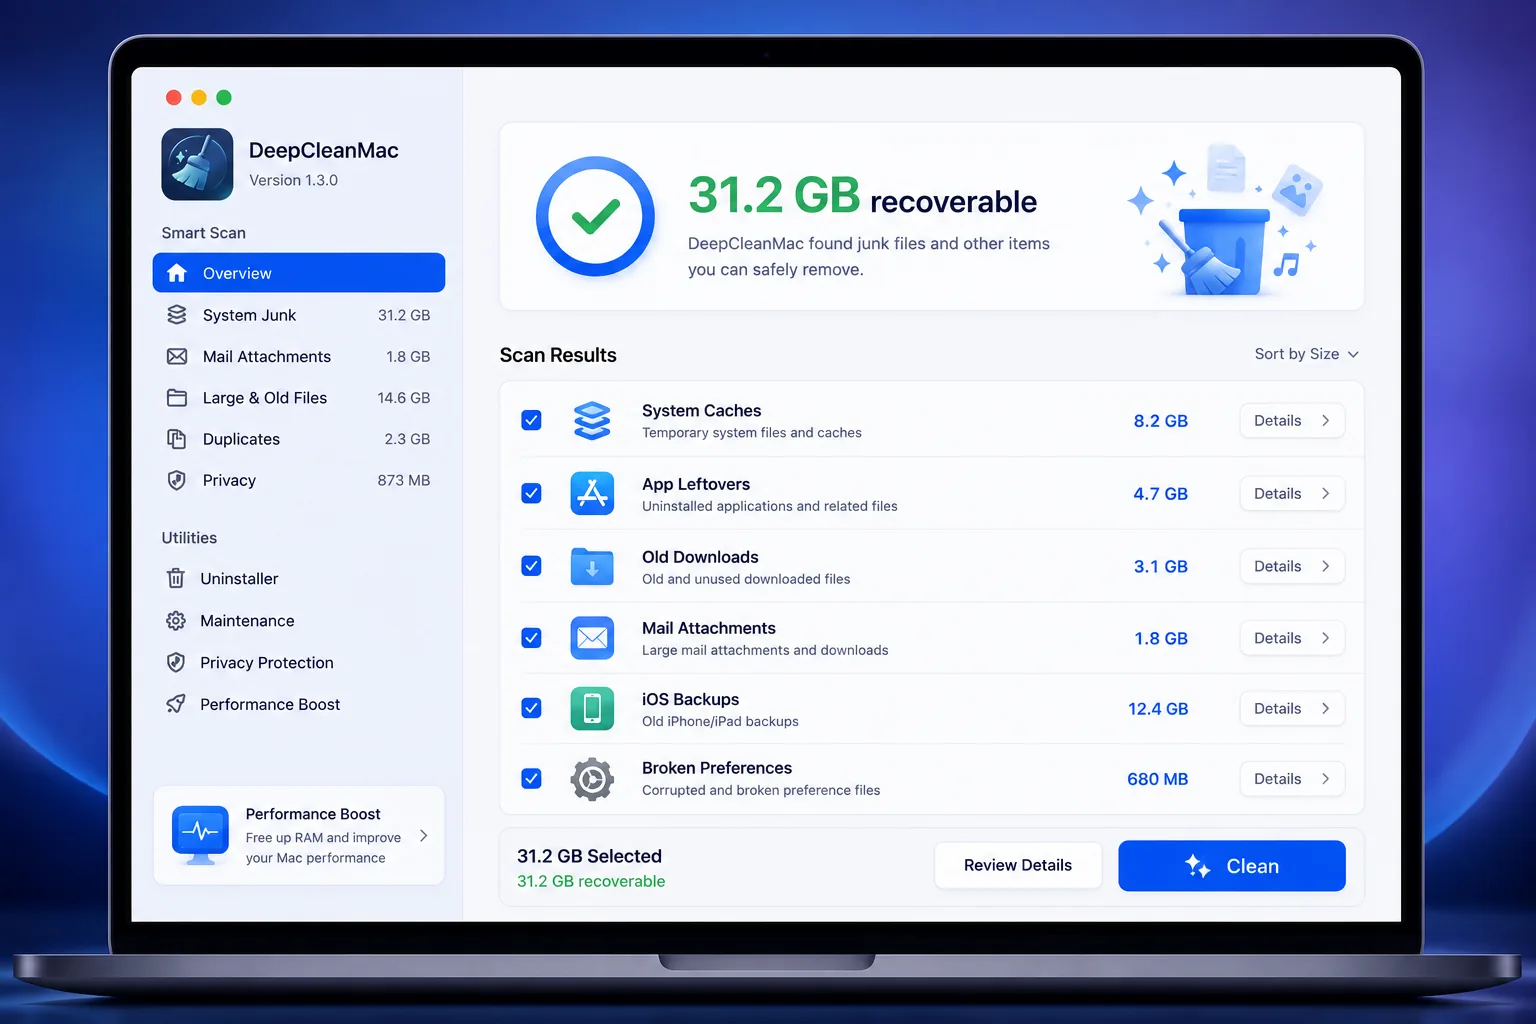
DeepCleanMac scans 200+ hidden system locations in under 30 seconds and shows you exactly what it found, with sizes, before anything is deleted. It finds the stale caches from your previous macOS version, the orphaned Application Support and Containers folders from uninstalled apps, compressed log archives that serve no purpose, and the old installer packages that are the single biggest win before an upgrade. Nothing is removed without your say-so, and it never touches active system files or personal documents.
For an upgrade specifically, the useful part is the review step. You see the full list with sizes, so you can decide whether you have found your 60GB or whether you still need to move a video project to an external drive. DeepCleanMac is $5 a year or $9 for a lifetime license, and the scan is free - you can see exactly how much you would recover before deciding anything. Download DeepCleanMac free and find out whether you have room for Golden Gate.
Frequently Asked Questions
How much free space does macOS 27 Golden Gate need?
▾
The stated minimum circulating for macOS 27 Golden Gate is 35.5GB, but plan for 60GB of real free space. The installer package is roughly 18GB, and macOS needs additional room to unpack it, stage the new system, and preserve your previous one until the upgrade completes. Installing at the bare minimum works but leaves no headroom for Spotlight to rebuild its index afterward.
Why does my Mac say not enough disk space when I have plenty free?
▾
Finder and System Settings count Time Machine local snapshots and other purgeable data as available space, but the installer cannot use it. Run df -h / in Terminal and check the Avail column for the real figure. If it is far lower than what Finder shows, run tmutil listlocalsnapshots / and thin the snapshots to recover the difference.
Can I install macOS 27 Golden Gate on an Intel Mac?
▾
No. macOS 27 Golden Gate is the first version of macOS to run exclusively on Apple Silicon, so every Intel Mac is excluded regardless of how much free space it has. macOS Tahoe 26 is the final release supporting Intel processors. If Golden Gate is not appearing in Software Update, check your processor in Apple menu > About This Mac before troubleshooting storage.
How big is the macOS 27 Golden Gate installer?
▾
The baseline InstallAssistant package is roughly 18GB. That is the download size, not the space required to install - macOS also needs room to decompress the package, write temporary setup files, stage the new system volume, and keep your existing system intact until the new one boots successfully. Budget at least twice the download size.
Why do different websites give different storage requirements for macOS 27?
▾
Lower figures like 30GB or 35.5GB are stated minimums - the threshold below which the installer refuses to start. Higher figures like 50GB or 60GB come from people who have watched installs fail with less. Most sources also do not specify whether they mean free space or the inflated figure Finder reports, which on APFS are different numbers.
Is it safe to delete Time Machine local snapshots?
▾
Yes, provided you have a real backup on an external drive or network volume first. Local snapshots live on the same disk as your data, so they protect against accidental deletion but not against drive failure - they are a convenience layer, not a backup. Once a proper backup exists, thinning snapshots with tmutil is safe and often recovers tens of gigabytes.
How much space does macOS 27 Golden Gate use after installation?
▾
Expect the installed system to occupy noticeably more than Tahoe once Apple Intelligence finishes downloading its on-device models, which happens after the upgrade rather than during it. Those models run around 7GB officially, with user reports above 14GB when extra languages and image features are enabled. All of it is filed under System Data.
The macOS 27 Golden Gate storage requirement is not really one number, which is why you keep finding different ones. The stated minimum is around 35.5GB, the realistic target is 60GB, and the figure that actually determines whether your upgrade succeeds is the one in the Avail column of df -h / - not the one Finder shows you. Start there. Measure properly, then clear old installers and beta leftovers, thin your local snapshots, clean out caches and app leftovers, and only then start moving personal files around. Most people find their 60GB somewhere in the first three steps without giving up anything they wanted to keep. And check your processor first: if you are on an Intel Mac, Golden Gate is not coming, and Tahoe 26 is where your machine stops. DeepCleanMac scans 200+ hidden locations in under 30 seconds and shows you every cache, log, leftover, and old installer it finds with sizes attached, before anything is removed. Download DeepCleanMac free and see how much room you can clear before Golden Gate asks for it.
Free download. Scans 200+ hidden locations in seconds.