
How to Check Battery Health on MacBook: 5 Ways to Read Capacity, Cycles, and Condition
Quick Answer
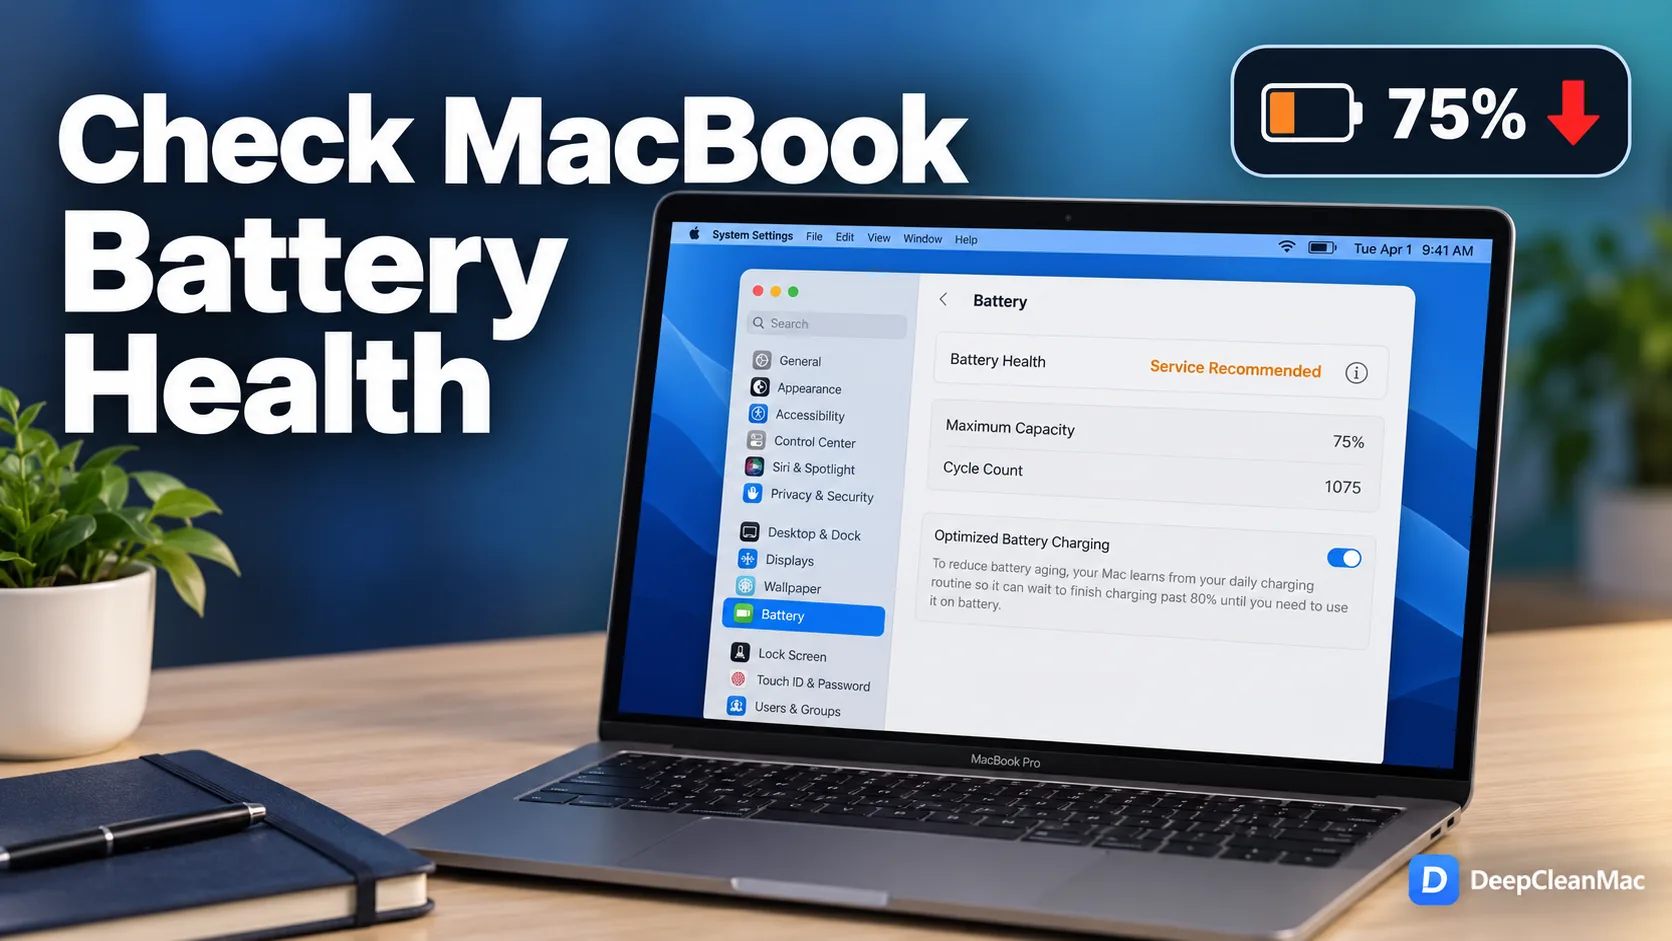
To check battery health on a MacBook, open System Settings > Battery and click the info button next to Battery Health. You will see two things: Condition (Normal or Service Recommended) and Maximum Capacity as a percentage of the battery's original capacity. For the complete reading in one command, open Terminal and run system_profiler SPPowerDataType - it prints Cycle Count, Condition, and Maximum Capacity together in about a second, and it works on every Mac notebook regardless of macOS version. As a rough guide, a Condition of Normal with maximum capacity at or above 80% is healthy. Below 80%, or a Condition of Service Recommended, means the battery is nearing the end of its useful life. Note that Service Recommended is Apple's own judgment about the cell, not a fixed percentage threshold - some Macs show it at 87%, others not until the high 70s.
Battery health is the single most useful number about an aging MacBook, and it is also the one most people misread. Maximum Capacity is not a battery percentage. It is not how much charge is left right now. It is an estimate of how much charge the cell can still hold compared to the day it left the factory - so a MacBook showing 100% charge and 78% maximum capacity is fully charged and substantially worn at the same time.
That distinction matters because battery health is what actually determines whether your Mac still lasts a workday. A three-year-old MacBook Air at 88% capacity will feel close to new. The same machine at 72% will lose roughly a quarter of its original runtime, drop percentage points in sudden jumps, and occasionally shut down before reaching 0%. Neither of those Macs is broken. Only one of them needs a battery.
There is also a lot of bad advice around this topic. You will find sites promising to check your battery health from a web page, apps that claim to recalibrate or restore lost capacity, and forum threads insisting that a specific charging ritual will keep you at 100% forever. None of that holds up. A browser cannot read your battery's capacity, capacity loss is a chemical change that cannot be reversed in software, and the numbers macOS reports are already smoothed estimates rather than direct measurements.
This guide covers five ways to read your MacBook's battery health, from the two-click route in System Settings to a Terminal command that exposes the raw milliamp-hour figures macOS calculates its percentage from. It then explains what each reading actually means, what causes health to drop, and what you can realistically do about it. Every method here was verified on macOS 26.
5 Ways to Check MacBook Battery Health
Method 1: Check Battery Health in System Settings
Step 1: Open System Settings from the Apple menu or the Dock.
Step 2: Click Battery in the left sidebar.
Step 3: Look at the top of the pane - your battery health appears in plain text next to Battery Health, usually as 'Normal' or 'Service Recommended'.
Step 4: Click the info button (the encircled 'i') next to Battery Health.
Step 5: The panel that opens shows Battery Condition and Maximum Capacity as a percentage. On recent macOS versions it also shows your Cycle Count.
Step 6: If you do not see a Battery Health row at all, you are on an older macOS version or a desktop Mac. Use Method 2 instead.
This is the route Apple intends you to use, and for most people it is the only one they need. The Maximum Capacity figure here is the same number the rest of this guide digs into - the battery's present capacity expressed as a percentage of its original rated capacity. One thing worth knowing: this percentage is a calibrated estimate, not a raw measurement. macOS smooths it and holds it steady rather than letting it drift up and down with temperature and charge state, which is why it tends to sit at one value for weeks and then step down. Method 4 shows you the unsmoothed figures underneath it, which are usually a few points lower.
Method 2: Use System Information (Works on Every macOS Version)
Step 1: Hold the Option key and click the Apple menu in the top-left corner.
Step 2: The first item changes from 'About This Mac' to 'System Information'. Click it.
Step 3: In the sidebar, scroll to the Hardware section and select Power.
Step 4: Read the Health Information block on the right. It lists Cycle Count, Condition, and Maximum Capacity.
Step 5: The Charge Information block above it shows State of Charge, whether the battery is currently charging, and whether it is below the warning level.
Step 6: The Model Information block shows the battery's serial number and firmware, which is useful if you are arranging a service appointment.
This is Apple's own documented method for finding battery information and it has worked unchanged across every macOS release for over a decade, which makes it the reliable fallback when a System Settings layout changes. It is also the better option if you are checking a Mac you are thinking of buying secondhand: it takes about five seconds, needs no downloads, and shows cycle count and condition side by side. If the seller's Mac shows a high cycle count with a Normal condition, that is a machine that has been used steadily but is still fine. A low cycle count with Service Recommended is more concerning, because it suggests a cell problem rather than ordinary wear.
Method 3: Read Battery Health from Terminal in One Command
Step 1: Open Terminal from Applications > Utilities, or press Command + Space and type 'Terminal'.
Step 2: Type or paste this command and press Return: system_profiler SPPowerDataType
Step 3: Look for the 'Health Information' section in the output.
Step 4: You will see three lines that look like this:
Cycle Count: 1075
Condition: Service Recommended
Maximum Capacity: 75%
Step 5: To skip straight to the health lines without the rest of the output, run: system_profiler SPPowerDataType | grep -A3 'Health Information'
Step 6: No admin password and no sudo is required. The command only reads information and changes nothing.
This is the fastest complete reading available, and it is the command behind every legitimate 'paste your Terminal output' battery checker on the web. The example values above come from a real M1 MacBook Air, just under six years old: 1075 cycles, 75% capacity, Service Recommended. That machine still boots and runs fine, it simply holds about three quarters of the charge it once did. Because the output is plain text, this command is also the easiest way to get a battery reading off a Mac you are helping someone with remotely - they can copy the six lines into a message rather than trying to describe what a settings pane looks like.
Method 4: Get the Raw Capacity Figures with ioreg
Step 1: Open Terminal.
Step 2: Paste this command and press Return: ioreg -r -c AppleSmartBattery | grep -E '^ +"(CycleCount|DesignCapacity|AppleRawMaxCapacity|DesignCycleCount9C|PermanentFailureStatus|Temperature)" ='
Step 3: Read DesignCapacity - the battery's original rated capacity in milliamp-hours (mAh). On the MacBook used for this guide it reads 4382.
Step 4: Read AppleRawMaxCapacity - what the cell can hold today, also in mAh. On the same machine it reads 3038.
Step 5: Divide the second by the first for your raw health figure. Here that is 3038 / 4382 = 69.3%, against the 75% macOS reports in System Settings.
Step 6: Read DesignCycleCount9C for the cycle limit Apple rated your specific model for (1000 on all modern MacBooks), and PermanentFailureStatus, which should be 0. Temperature is reported in hundredths of a degree Celsius, so 3088 means 30.88 C.
This is the layer underneath everything else in this guide, and it explains a discrepancy that confuses a lot of people. The raw arithmetic almost always comes out lower than the percentage macOS shows you - roughly six points lower in the example above. That is not a bug and neither number is lying. AppleRawMaxCapacity is an instantaneous estimate from the battery's fuel gauge that moves with temperature and charge state, while the Maximum Capacity percentage in System Settings is deliberately smoothed and conservative about stepping down. If you check the raw value twice in a day you will often get two different answers, which is precisely why Apple does not show it to you. Treat the raw figure as a sanity check and a trend line, not as your real health number. PermanentFailureStatus is the one field here worth acting on immediately: anything other than 0 indicates the battery management system has flagged a hardware fault.
Method 5: Track Battery Health Over Time with a Third-Party App
Step 1: The built-in methods above give you a snapshot. To see a trend, you need something that records readings over weeks.
Step 2: coconutBattery is the long-standing free option. It shows design capacity, current capacity, cycle count, battery age, manufacture date, and charger wattage on one screen.
Step 3: Menu bar apps such as Battery Health 3 add charts, temperature history, and notifications when capacity steps down.
Step 4: Take a reading roughly once a month and note it. Two readings six months apart tell you your actual degradation rate.
Step 5: Be selective about what you install. Battery utilities are a favorite disguise for adware on macOS, so stick to well-known developers and download from the developer's own site or the Mac App Store.
Step 6: Ignore any app that claims it can restore, repair, recalibrate, or reset your maximum capacity. That is not a thing software can do.
A degradation rate is far more actionable than a single percentage. Losing four or five points a year is ordinary. Losing fifteen points in six months means something specific is happening - usually sustained heat, a workload that keeps the machine hot and plugged in at 100% all day, or an early cell fault. The second case is worth investigating while the Mac is still under AppleCare, because a battery that falls below 80% of original capacity within the coverage period is replaced at no charge. A snapshot taken the week you finally notice a runtime problem cannot tell you any of that, which is the argument for taking a reading now even if your battery is fine.
What Each Battery Health Reading Actually Means
macOS reports several battery figures and they measure genuinely different things. Reading them correctly is most of the work, because the number people fixate on is often not the one that explains the behavior they are seeing:
| Reading | What It Means |
|---|---|
| Maximum Capacity | Present capacity as a percentage of the battery's original rated capacity. This is the headline health number. 100% means as-new, 80% means the cell holds four fifths of what it did. It is a smoothed estimate, not a live measurement, so it steps down in jumps rather than drifting. This is the figure that predicts your runtime. |
| Cycle Count | How many full charge cycles the battery has completed, where one cycle equals 100% of capacity drawn in total, not one plug-in. Every modern MacBook is rated for 1000 cycles. It measures use, not condition - a battery can be at 900 cycles and perfectly healthy, or at 200 cycles and failing. |
| Condition: Normal | The battery management system sees nothing abnormal in capacity, internal resistance, or voltage behavior. Normal can coexist with a fairly low maximum capacity and a high cycle count. It means 'behaving as expected for its age', not 'as good as new'. |
| Condition: Service Recommended | Apple's judgment that the cell no longer holds charge as it did when new, or is not functioning normally. It is not tied to a fixed percentage - it can be triggered by abnormal internal resistance or unstable voltage rather than low capacity, which is why some Macs show it near 87% and others not until the high 70s. The Mac remains safe to use. |
| Design Capacity vs Raw Max Capacity | The two milliamp-hour figures behind the percentage, visible only through ioreg. DesignCapacity is the factory rating, AppleRawMaxCapacity is today's unsmoothed estimate. Their ratio usually lands a few points below the percentage macOS displays, because the raw value moves with temperature and charge state. |
| Optimized Battery Charging | The feature that learns your routine and holds the charge near 80% until you need a full battery. It reduces the time the cell spends at high voltage, which is one of the main accelerants of capacity loss. It does not lower your maximum capacity - it slows how fast that number falls. |
Why MacBook Battery Health Drops, and How Fast
Lithium-ion capacity loss is chemistry, not wear and tear in the mechanical sense. Every charge and discharge moves lithium ions between the electrodes, and a small fraction of them get locked into a layer that forms on the anode surface and never come back. That layer thickens over the life of the cell. The capacity it consumes is gone permanently - which is why no software, no reset, and no charging ritual can restore a maximum capacity figure that has already fallen.
Three factors govern how quickly that happens, and cycle count is only one of them.
Heat is the most aggressive. The chemical reactions that degrade a cell roughly double in rate for every 10 C rise in temperature. A MacBook that spends its days compiling code or exporting video at 90 C internal temperature will lose capacity dramatically faster than an identical machine used for email, even at the same cycle count. This is the main reason two Macs bought together can be twenty points apart on health three years later.
Time at high state of charge is the second, and it is the one most people get wrong. A cell held at 100% sits at its highest internal voltage, and high voltage accelerates the same degradation reactions. A MacBook left permanently docked at 100% ages faster than one that cycles between 30% and 80% daily, even though the docked machine accumulates almost no cycles. Optimized Battery Charging exists specifically to address this, by delaying the last 20% of charging until shortly before you typically unplug.
Calendar age is the third and it is unavoidable. The degradation layer forms slowly even in a cell that is never used at all. A sealed spare battery loses a few percent a year sitting in a drawer.
Cycles matter, but they are the least predictive of the four on a modern MacBook, because 1000 cycles is a genuinely high allowance. Most people replace the machine before they get near it. What actually determines whether your battery is at 90% or 70% after three years is mostly how hot it ran and how much of its life it spent sitting at full charge.
As a rough expectation: four to six points of capacity a year is typical for ordinary use. Ten or more points a year suggests heat or a permanently-plugged-in-at-100% pattern. Apple designs these batteries to retain up to 80% of original capacity at their rated 1000 cycles under normal conditions, so a Mac significantly below that curve is worth looking at more closely.
How to Slow Down Battery Health Loss
1. Leave Optimized Battery Charging enabled
System Settings > Battery > Battery Health, then make sure Optimized Battery Charging is on. It learns your schedule and holds the charge near 80% until shortly before you normally unplug, cutting the hours your cell spends at peak voltage. People sometimes switch this off because they see the charge stall below 100% and assume something is broken. It is not - that stall is the feature working. If you need a full charge for a specific trip, click the battery icon in the menu bar and choose to charge fully now.
2. Manage heat before you manage anything else
Heat degrades a battery faster than cycles do, so anything that keeps your Mac cooler directly protects capacity. Do not use a MacBook on a duvet, cushion, or lap blanket that blocks the vents. Avoid leaving it in a hot car or in direct sun. If a background process is pinning the CPU for hours - check Activity Monitor's CPU tab for anything consistently above 5% while you are idle - that is heat you are generating for no reason, and it is worth tracking down.
3. Do not aim for a permanent 100%
If your MacBook lives on a desk plugged in all day, it is spending most of its life at the state of charge that ages it fastest. You do not need to ration your charging or run elaborate calibration routines, but unplugging for part of the day and letting it run down into the 40s is measurably kinder to the cell than sitting at 100% for nine hours. The old advice about fully discharging monthly is obsolete - deep discharges do not help modern batteries and mildly hurt them.
4. Take a reading every month or two
Run system_profiler SPPowerDataType and note the three health lines somewhere. It takes ten seconds. The value is not the individual reading, it is the trend: two readings six months apart give you a degradation rate, and a rate is the only thing that tells you whether your battery is ageing normally or unusually fast. If you find you have lost more than ten points in half a year and the Mac is still under AppleCare, that is worth an appointment while replacement is free.
5. Do not trust anything promising to restore capacity
Capacity loss is a physical change inside the cell. No app, Terminal command, SMC reset, or charging sequence reverses it. Tools advertising battery repair, recalibration, or health restoration on macOS are at best doing nothing and at worst adware - battery utilities are a common disguise for it. Resetting the SMC can occasionally correct a battery reading that has become obviously wrong, such as a stuck percentage, but it corrects the reporting, not the cell.
6. Reduce the idle power draw that costs you cycles
This is the one lever software genuinely has. Background agents, orphaned launch daemons from apps you deleted long ago, and login items you never approved all draw power continuously. They do not damage the cell directly, but they shorten every charge, which means more full cycles per week and more heat. Check System Settings > General > Login Items & Extensions, and look in ~/Library/LaunchAgents for .plist files belonging to apps that are no longer installed.
Where DeepCleanMac Fits In
It is worth being straightforward about this: no cleaning app can improve your battery health. Maximum capacity is a property of the cell, and once it is gone the only fix is a new battery. Anything marketed otherwise is selling you something that does not exist.
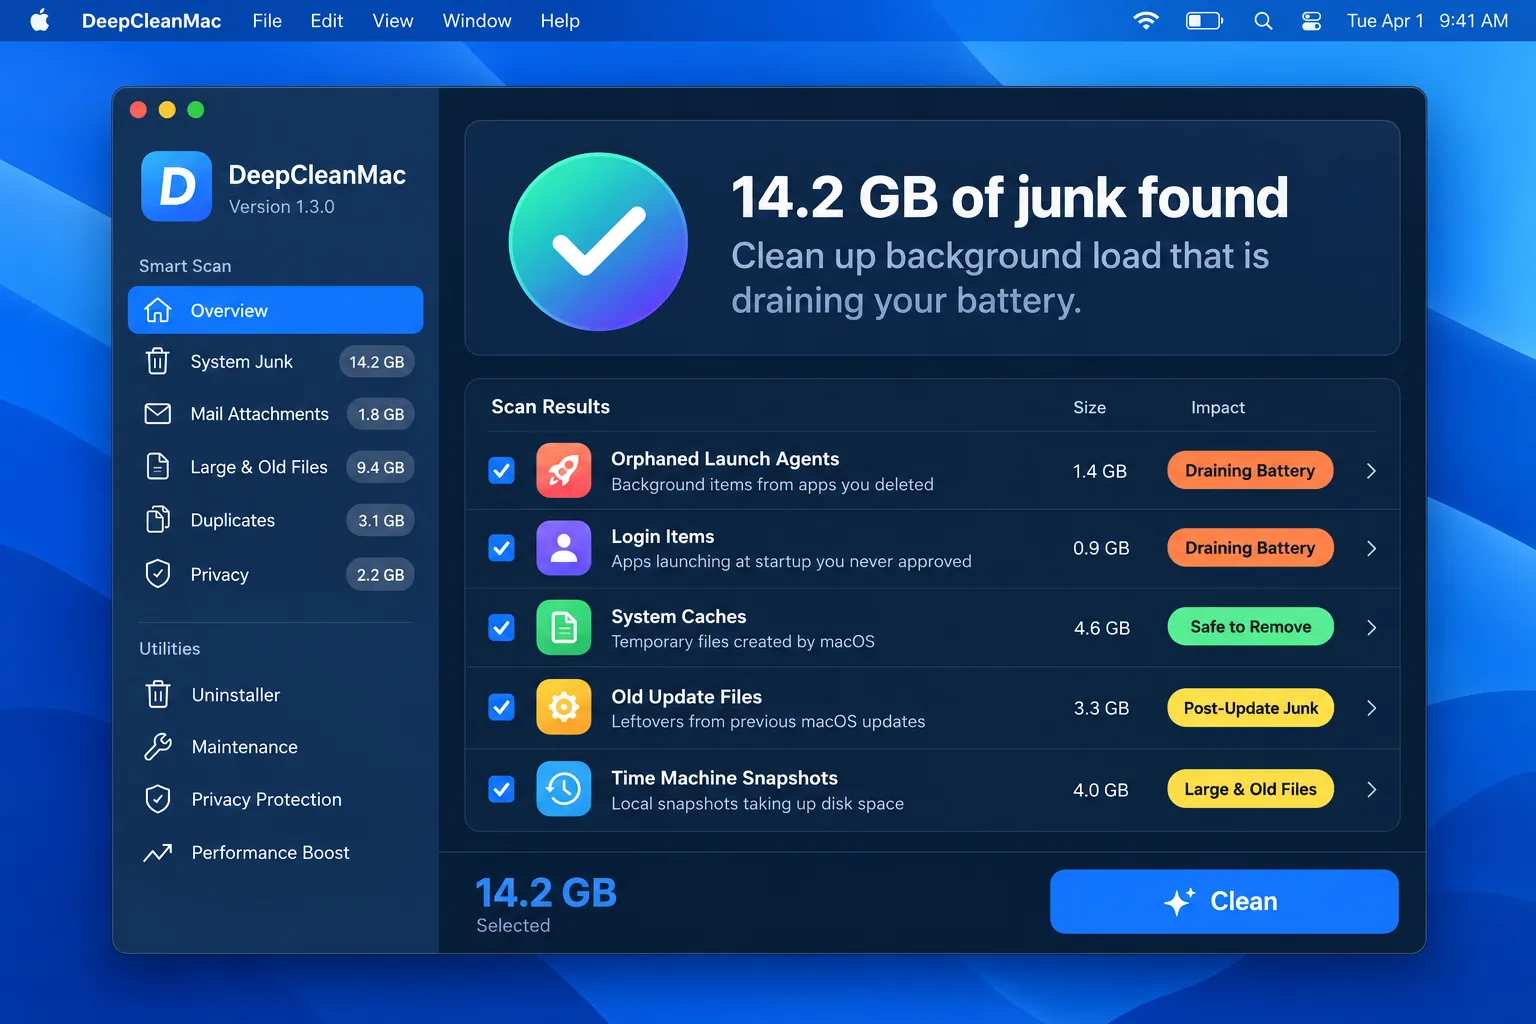
What software can affect is how hard your Mac works while idle, and that is not nothing. Orphaned launch agents from apps you uninstalled months ago keep running. Background helpers from Adobe, Dropbox, Google Drive, and a dozen other installers start at login whether or not you use them that day. Caches left behind by a macOS upgrade add disk pressure that makes the system do more housekeeping. None of this destroys a battery, but it does raise your baseline power draw, which means shorter time between charges, more full cycles accumulated per week, and a warmer machine. Heat and cycles are two of the three things that actually determine how fast capacity falls.
DeepCleanMac scans 200+ hidden locations in under 30 seconds and shows you what it found, with sizes, before anything is removed - leftover caches, orphaned application support folders, old update files, and launch agents belonging to software that is no longer on the Mac. You review the list and decide. It will not restore a single percentage point of capacity, and it does not claim to. It removes the background load that was costing you charge for no benefit. If your battery health is already below 80%, the honest answer is that you need a battery, not a cleaner. Download DeepCleanMac free and see what is running on your Mac that you never agreed to.
Frequently Asked Questions
What is a good battery health for a MacBook?
▾
At or above 80% maximum capacity with a Condition of Normal is healthy. Apple designs Mac notebook batteries to retain up to 80% of original capacity at their rated 1000 cycles, so 80% is the line where a battery is considered consumed rather than faulty. In practice, most people do not notice a runtime problem until they drop into the low 80s, and 90% or above on a two-year-old machine is very good.
Can I check my MacBook battery health online?
▾
Not directly. A web page cannot read your battery's capacity or cycle count - browsers have no access to that hardware data, and the limited Battery Status API that some browsers expose only reports the current charge level and whether you are plugged in. Sites offering an online battery health check work by giving you a Terminal command to run and asking you to paste the output back. That is legitimate, but you can skip the middle step and just read the output yourself using Method 3 above.
At what percentage should I replace my MacBook battery?
▾
Below 80% maximum capacity is the usual point where replacement becomes worthwhile, and it is the threshold Apple uses for free replacement under AppleCare. But the number matters less than the symptoms. If your Mac still comfortably lasts as long as you need it to, a reading of 78% is not a reason to spend money. If it shuts down unexpectedly, drops charge in sudden jumps, or dies by lunchtime, replace it regardless of what the percentage says.
Why does my MacBook say Service Recommended at 88% capacity?
▾
Because Service Recommended is not a capacity threshold. It means the battery management system has detected that the cell is not behaving normally, which can be abnormal internal resistance or unstable voltage rather than low capacity. Trigger points vary between individual batteries - some flag it near 87%, others not until the high 70s. The Mac is safe to keep using, but it is worth an appointment, especially if it is still under warranty.
Does Optimized Battery Charging reduce my maximum capacity?
▾
No. It reduces the time your battery spends sitting at 100%, which is one of the main accelerants of capacity loss, so it slows the rate at which maximum capacity falls. The confusion comes from watching the charge stop in the high 80s or low 90s and reading that as lost capacity. That is the current charge level being held back deliberately, not your health figure changing.
Can I reset or recalibrate my MacBook battery health?
▾
You cannot restore lost capacity - it is a permanent chemical change in the cell. You can sometimes correct a reading that has clearly gone wrong, such as a percentage stuck at one value or a wildly inaccurate time estimate, by resetting the SMC on an Intel Mac or simply shutting down fully and restarting on Apple Silicon. That fixes the reporting, not the battery. Modern MacBooks do not need the monthly full-discharge calibration cycles that older models did.
Why is my raw capacity lower than the percentage macOS shows?
▾
Because they are different kinds of number. The percentage in System Settings is a smoothed, conservative estimate that macOS holds steady and steps down in stages. AppleRawMaxCapacity, visible through ioreg, is an instantaneous reading from the battery's fuel gauge that shifts with temperature and charge state. The raw figure typically lands several points lower and will vary if you check it twice in a day. Trust the System Settings number as your health figure.
Checking battery health on a MacBook takes two clicks in System Settings or one command in Terminal, and the reading you get answers a genuinely useful question: is this Mac slow to charge and quick to die because of its age, or because of something you can fix? Read the numbers as a set rather than fixating on one. Maximum capacity predicts your runtime. Cycle count measures how much use the battery has had, not its condition. Condition is Apple's own verdict on the cell and can flag a problem at capacities that otherwise look fine. Below 80% with a Condition of Service Recommended, you need a battery, and no amount of settings tweaking or cleanup will change that. Above that line, most complaints about battery life are not really about the battery. They are about what the Mac is doing while you are not looking - background agents, login items you never approved, and leftovers from software you removed long ago, all drawing power continuously and generating heat that ages the cell faster than it needs to. DeepCleanMac scans 200+ hidden locations in under 30 seconds and shows you exactly what it found before removing anything. Download DeepCleanMac free and clear out the background load that is costing you charge for nothing.
Free download. Scans 200+ hidden locations in seconds.